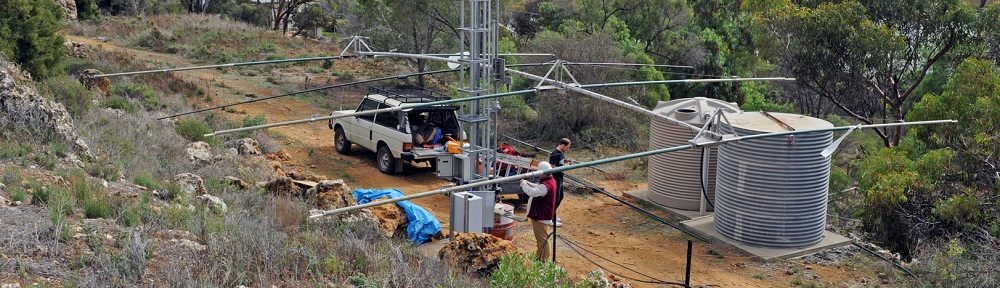
As part of the final push to get my Hilux past her impending Road Worthy I spent quite a bit of time dealing with the electrical’s. I hate working on automotive wiring at the best of times so to make my job easier I remove the centre console and seats to give me room to manoeuvre.
After pulling out the seats I found there was a heap of dirt and muck that had collected under the floor mat, along with evidence of a water leak from the front windscreen in both foot wells. While I was under the floor mat I also took the opportunity to remove unused wiring from different radio experiments, that had accumulated over the years. Cleaning up the floor pan certainly took a while.
Once the floor pan was clean I was able to tackle the last of the wiring jobs;
Get the high beam indicator lamp in the instrument cluster working
Get the washer bottle pump working again
Replace the second hand combination switch on the steering wheel (again), turns out it had a fault I’d not spotted previously when flashing the high beams with the headlights OFF
Now as you’d expect pulling an old car apart will quickly result in broken plastic clips. I was a little surprised when the cowling that covers the steering wheel column came part in my hands, it had gone brittle. Thankfully a suitable replacement it was reasonably priced at the local wrecker. While I was at the wrecker I also took the opportunity to pick up all those little plastic cover pieces that you loose over the years.
So after the wiring was done it was time to reassemble the interior and put this old girl back together.
I don’t know why but Hilux Alternators don’t seem to last long. I’ve now had four Asian made OEM aftermarket alternators fitted to my Hilux over the past 7-8 years. They last just longer than the statutory warranty period and then fail.
I replaced the last alternator in Jan 2015 and here we are 18 months later (~36,000km) and the OEM alternator I used has blown an internal seal within the vaccum pump which has allowed engine oil to penetrate the housing. Not to mention drop oil on the dump pipe and ground, I’ve spent way too much to have this engine leaking oil.
I did in fact notice last week that the vaccum assisted power brakes were a little “weak” in the mornings, made a mental note to investigate on the weekend. Friday night after a longer than usual drive to St Kilda in Adeliade, well I could smell burnt oil and a new “awful” whining sound emanating from under the bonnet. Damn there goes another one.
Anyway after a serious amount of google foo looking for any replacement alternator that wasn’t from an Asian OEM supplier I settled on a a Bosch replacement. Turns out that they are infact made in Asia, but I trust that German quality control will give me a better outcome.
I purchased the bosch unit from a local auto supplier that was having a 20% off sale on the day, which in fact pushed the price below trade. For the later model Hilux’s in the LN106 series where the vac pump is on the front of the alternator and not the rear, it’s hard to find the part number of the unit with the pump on the front. So if your looking for one it’s the BXD1312, it took the young assistant that served me two goes to get the right unit we resorted to looking on the physical shelf when the computer system was leading us a stray.
Just after I’d finished replacing the engine my windscreen wipers decided to call it day. Driving along a flat piece of road just before dark the wipers and washers decided to come on of their own accord with the switch in the OFF position.
It seems that my intermittent wiper control function had failed short circuit there somewhere, wasn’t hard to yank the connectors off the washer and wipers and carry on back home. Searching for a new windscreen wiper control module saw my parents standing in a wrecker close to their home fetching me some parts (thanks Mum & Dad!). Unbeknown to them the wiper and headlight stalk was being pulled out of a petrol automatic 4Runner, which is very close but not quite the same as a Hilux.
Anyway my parents dropped off the newly acquired part and I got my first look at it. There was one very obvious difference and that was the clock work spring and indicator cancelling mechanisms were different.
Looking closely it took me all of 10 seconds to realise that the clock work spring in this wiper mechanism had switches in the steering wheel, the question was what type; cruise control or radio?
Well that saw my parents back at the Wrecker the following morning to retrieve the attached steering wheel. I got an excited telephone call to tell me it was the cruise control switches. Yippee !!! Had we waited 10 minutes longer we’d have missed out, the second customer through the door of the wrecker that day was after the same steering wheel; Mine, all mine, Shooo !!!
The steering wheel on closer inspection had a loose grip which is unfortunately defect-able (but common) here in South Australia. So a visit to a local motor trimmer saw the steering wheel repaired. The best part is the cost of paying someone to repair the wheel was the same as buying a kit to do it myself off eBay; the difference is that I paid someone who knew what they were doing to effect the repair !
The steering wheel and wiper assemblies on 4Runner’s and Hilux’s are readily interchangeable so with a bit of disassembly, un-plugging, re-plugging and re-assembly my Hilux now sports cruise control switches in the steering wheel. You wouldn’t know it didn’t come without them,.
Searching the net I’ve found a number of after market cruise control systems that are easy to retro-fit to many different vehicles. All that is required is a speed sensor, clutch switch, tap the brake circuit, plug things together and mount some switches close to the steering wheel.
I’ve got I’ve got a feeling that I can pull a brake switch assembly out of another Hilux and mount this to the clutch pedal for not many $$$. That would just leave me with mounting a vacuum actuator (some are servo based) and wiring the thing together. I can see another project in the wind.. At least I have the “factory” steering wheel switches already sorted.
With the lights upgraded it was about time I found a decent switch to sit on the dash board and activate the spotties.
I’d noticed recently that Narva offered a series of “Carling” styled switches that came with blue indicators that looked about the right size. I hate blue lights in cars, it hurts the eyes and causes fatigue.
There are three switch positions in the car that measured up close to a standard 32mm x 26mm DIN cutout.
A bit of google foo and I find online suppliers that can offer the same switch with various printing with a range of indicator colours. I ordered Green to match the rest of the console.
They fit perfectly.
There was only just a tiny amount of filing required to squeeze the switch into the cutout, perhaps a millimetre or two. Anyway the effect is great.
The switch has two indicators, the lower that comes on when the lights are activated and a second under the symbol when you activate the switch. This required a bit of thinking as to how to wire it properly and an additional diode to get it to work with the relay kit. I should at some stage draw up the circuit diagram.
My only complaint is the LED’s are far brighter than the equivalent incandescent bulb which means even when dimmed by the rheostat they are still too bright. I’ll be pulling the switch out and wiring a separate resistor in series to lower the brightness further. Hmm… that might require a transistor and zener, time to get that piece of paper out.
Oh and while I was ordering one “spot lights” switch I grabbed a few others that I thought I might want so there is now a small collection ready and waiting for further improvements.
Well what a disappointment. After three weeks of wrestling with the Autotecnica Gauges that I bought, I’ve called it a day. They just don’t work as one would expect and will be ripped out of the car and returned for a refund. There dummy has been spat !
These gauges certainly looked the part and were of a reasonable price, however their operation, reliability and accuracy were their ultimate failure.
The installation instructions were poor to say the least, just a single piece of paper with rough as guts chicken scratching’s as a guide how to wire them. This was not a great start. There was no information (or clues) regarding wire gauge, so after measuring less than 100mA per gauge plus sender I decided it was safe to use 28 gauge (0.25mm^2) wire.
Looms were made that connected the oil pressure sender (electronic), boost pressure sender (electronic), coolant sender (resistive) and EGT probe (thermocouple). Where the wires came close to the engine block they were sleeved in fibreglass everywhere else heat shrink. In all the job looked nice.
However the Boost pressure gauge measured 3 psi low at full boost (~10psi) which was at least 30% in error. Results were confirmed using a trusted mechanical pressure gauge. The EGT gauge would every once in a while stop reading anything and sit there and sulk. The probe was tested by my Agilent multimeter that could read K-type thermocouples. The water gauge worked perfectly, the oil pressure gauge well that was possessed and did its own thing. If you watch the next video you’ll see what I mean.
So that left me with a working water gauge (nice to have), under reading boost gauge (should have), faulty EGT display (shall have) and weird oil pressure gauge (nice to have). A total score of 1 out of 4 with all critical systems in the red.
Oh well that will learn me for being cheap. With luck I’ll get that refund, these gauges certainly did not work as advertised and were not fit for purpose.
I am also very glad that I yanked them when I did. I borrowed my local car mechanics four post hoist to get at the oil pressure sender when it fell out in my hand. It turns out the brass fitting I’d bought for the oil pressure sender had gone brittle and fractured where it came out of the block. Nothing an easy out couldn’t rectify, but I’m now very glad this came out in my hand rather than at 100kph on the freeway spraying hot oil over the wheels, engine bay and brakes. A major disaster averted.
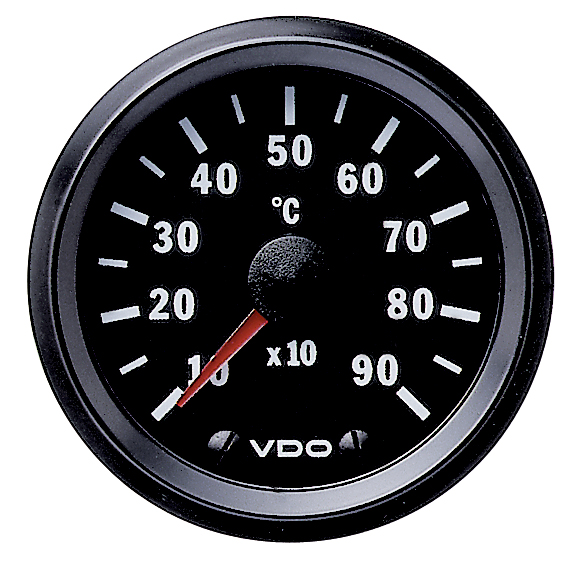
So for now I’ve have settled on a pair of trusty ol’ VDO mechanical gauges, shouldn’t look too bad in the pod. The pod came with 52 -> 60mm adaptors. These gauges are a little plain when compared to my previous gauges, but functional is what I’m after at this point.
That at least means I can monitor EGT and Boost properly and make sure that this new engine is looked after. With these gauges being partially mechanical it will be interesting to bring pipe and heavy wires in from the engine bay.
I also laugh when you have to marry imperial with metric. The DTS turbo kit dump pipe has a metric O2 sensor port into which I screw the EGT probe. My previous Chinese EGT sensors were thin-ish and came with a 1/8 NPT 27 tpi thread, so I was lucky enough to be given a steel pipe reducer that fitted nicely. Of course VDO don’t like the small probes and have supplied a much larger unit with a 1/4 NPT 14 tpi thread. So after a lot of searching I found that DTS sell the adaptor (fancy that, on the left) and their HQ was here in Adelaide.
I’m certainly glad I found this little doodad it saved me from having to buy/beg/borrow or steal a 1/4 NPT 14 tpi tap !
Well after some 392,000 km’s my Old 1996 Toyota Hilux decided to call it a day in rather spectacular fashion.
On this trip the harmonic balancer spun on the end of the crank shaft, which was a messy situation that would ultimately result in either a proper engine rebuild or permanent retirement of the car.
She came home on the back of a trailer, the first time in 18 years that she’s never made it home on her own.
Now I simply don’t like the newer Hilux models with all their fan dangley new engines that make noise on RF and you can’t drop a spanner between the engine and the body and not see it fall through. My Hilux had a “simple” Toyota 3L naturally aspirated 2.8L mechanically injected diesel, this makes it the perfect car for mobile HF and foxhunting, since there is nothing in the car that can make any RF noise (except the alternator brushes). Besides I’ve owned this car for 18 years now so I know everything that is wrong with it, what’s been replaced and what needed to be fixed.
I had planned on rebuilding the engine at 400,000 kms since it was due a new timing belt and my parents were going away for 3 months so I could borrow there spare car. However with a bit of “bush mechanics” and a tube of loctite 660, we (well the royal we) effected a repair on the old engine for the necessary three weeks to tide me over. When the old girl was backed down the drive way she’d done just over 395,000 kms not a bad innings.
One of my fellow club members Gary VK5FGRY happens to be a retired mechanic with many years of experience and offered to help with a rebuild. Certainly without his help, knowledge, research, friendship, attention to detail and support I’d have probably not have rebuilt the engine and simply retired the old girl. I’m glad I didn’t and will be forever grateful of all the hard work and effort that Gary poured into my “rebuild project”.
So the first step was to pull out the engine and see what sort of mess we were dealing with. Nothing like rebuilding a car in the drive way so here we go.
Yep that is one very dirty, tired, greasy old oil burner. Mind you she’s *never* had a spanner on the head bolts. I’ve replaced starter motors, alternators, water and vaccum pumps, rebuild front and rear diffs a few times, replaced shockers, springs and bushes, but you get that with any vehicle that is 20 years old.
After researching my options and costs for a local rebuild I decided to send my engine to APA Diesel in Sydney. The cost of freight and insurance was surprisingly low for a pallet weighing some 170kgs. So here is what I sent to Sydney, and what I got back 4 weeks later. The boys at APA Diesel certainly did a nice job, the only piece missing was the sump plug (*grin*) not too bad IMHO. The frame for the motor on the pallet was custom built for less than $50 in materials.
The difference is quite clearly chalk and cheese.
Ok you might notice that on the exhaust side of the engine a few additional bits have been added. The original engine made 63kW@157Nm or torque when new, which was barely enough to get the Hilux up the next hill. It seemed silly to rebuild her and not “tweak” some extra ponies, so some forced induction bits were procured and bolted on. Part of the reason for me choosing an interstate Engine builder. The list of what was changed within the engine is long, but in short she’s been built to take the turbo from the ground up. No point in doing half a job. I’m expecting something like 80kW @ 250Nm of torque when we finally get her on the dyno in a few months for a tune up, will wait until after the breakin period to find out.
With the engine out that certainly left a gaping hole in the engine bay, especially when we dropped the gearbox and drive shafts out too for some repairs. There was still a lot of oil around, but nothing a few tins of degreaser and a bit of high pressure cleaning can’t fix.
The gearbox was also leaking a little (ok a lot of) oil from it’s seals and had a faulty gear selector. At some point in the past the nut on the rear output shaft wasn’t done up tight and had been leaking for a considerable time, the mess 2′ either side of the gearbox on the under body of the car certainly stands testament to the duration of this leak. Steam cleaner here we come.
Ordering parts online for these old Hilux’s is now days very easy with the car being more than 15 yrs old. All of the OEM parts manufactures are pumping out cost effective replacements. It helps that these Hilux’s are popular to rebuild here in Oz. I ordered new seals, new selectors and bushes for a few hundred bucks and re-sealed the gearbox. It was not making any noise prior to the build so there was no need to open her up for surgery, just clean up around the outside. Man did that require some degreaser and high pressure cleaning however.
During disassembly we also found that the input shaft to the gearbox had been nurgled by the previous spigot bearing disintegrating. Well munted is perhaps a better term, cant use the other vernacular in a public forum, but a picture speaks a 1000 words. It should be nice and flat without the scallop.
Time to call on another favour from a club member Dennis VK5FDEN who is a fitter and turner by trade, also with years of experience to make a new sleave. A bit of loctite 660 (this tube got some good use), a good interference fit and some care and we simply increased the diameter of the spigot to the next size up bearing we could purchase. You should get the idea from these two pictures.
Once the gearbox went back into the car you’d have been hard pressed to realise that the spigot bearing had been changed and the input shaft repaired. A job well done that is for certain and one that should last the remaining lifetime of the car.
The power steering pump in the old girl snapped it’s bolt a number of years ago while on the Birdsville track. Not having a convenient fence to steal a bit of wire or enough cable ties, meant the pump spent time on a broken bolt for 300kms which resulted in the pump flogging out it’s mounts. This meant that the pump alignment to the belt was off centre and the belt and pump would make a squeek squeek noise when running. I was determined that this was not going to continue, so Dennis also repaired the pump with small bolt that would force the bolt back to where it should be with a lock nut. At some point the pump may have to come out and be repaired again (or replaced new if I can find one cheap enough), but cross that bridge later. For now the power steering pump is fixed.
So it was now time to start putting things back together.
As you can see above the engine went back in relatively smoothly. A bit of giggling and pushing for an hour or so saw the gearbox and engine re-united. Tyres had to be deflated to get the engine to clear the bull bar since the pipes on the turbo meant additional clearance was required on the hoist. We managed to clear the bull bar by only 1″ with the tyres fully deflated.
At this point in the build the majority of work was being done by torch light under the veranda late into the night, so taking pictures or videos was a little difficult. Once the engine went back it in was a straight forward process to hook up the electrics, plumb in all the necessary water lines, fuel lines and oil lines. Re-fitting of the starter motor was fairly straight forward if not a pain due to clearance etc.
It turns out the airconditioner compressor has a crook bearing so that will have to be fixed at some point in the not too distant future. We left the belt off to remind us to fix it.
A temporary exhaust was fashioned from the old header pipe, this will need to be “re-worked” at a local exhaust shop. A while ago I had the exhaust replaced with a 2 1/4″ system which it turns out is perfect for this turbo setup. Wooo the power.
Drive shafts were put back in, two of the yokes were “notchy” and were overhauled by my local mechanic near work. We’ll leave the discussions about bruised drive shaft mating surfaces for another time. If we only had the necessary press (*sigh*).
The rebuild process once the engine arrived was a little over 5 days, most of that was spent cleaning, washing and painting parts. This is a busy time of the year for our radio club, so there wasn’t much time on the weekends prior to do all of the prep work before hand. In all it’s taken 8-10 days to actual effort to take the engine out, repair and put back in. Linear time however has been weeks of waiting, the freight backwards and forwards being the longest. Doing it ourselves has saved a lot in labour costs.
Then all there was time to do was go and drive it, find some big hills and see what difference the turbo makes. Keeping in mind that this is a brand new engine that still has to be “broken” in, so no thrashing it, no labouring it just let it work and keep pulling. So maybe sometime next year or the year after it will be “finally broken in” (*grin*).
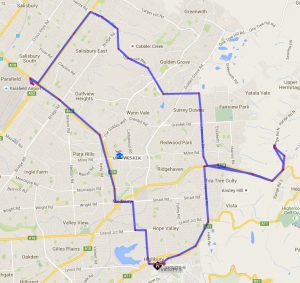
There are a number of hills in this loop that we just scooted over the top of in top gear at the speed limit, where previously it would have been in 3rd gear having the neck wrung out of it to hold 10 or so kph under the limit. There is no doubt that the turbo has increased both power and torque considerably. Before this drive Gary and I did a small loop over the top of Norton Summit up some very steep gradients, but I forgot my antenna so didn’t get it on APRS.
It’s funny too how cars develop gremlins while sitting still. When driving the car in the big loop above the windscreen wipers decided they wanted to start going along with the washer all of their own accord. A quick stop at the 24hr car wash (great lighting !) behind the servo saw both the windscreen wipers and washer unplugged. I’ve a nasty feeling the combination stalk is on it’s way out, otherwise there’s a relay there full of water I’m yet to find. Nothing that this scribe can’t fix.
Now all that remains is to add my new gauges so I can keep an eye on what the new engine is doing. All of the senders were added to the engine as we went (EGT, oil and water) just need to find a bit of fuel hose to plumb in the boost. I found these really nice dual gauges on ebay with electronic senders. A touch of class while being able to look at all “vital engine statistics”. The wiring should be complete in a few days.
Now I guess I’d better get back to work and earn a few dollars to pay for my engine rebuild. Can’t wait for the next fox or balloon hunt to see how much earlier we can arrive on site (*grin*). Taking it for a any drive puts a smile on your face.
I guess no post is complete without a video;
Thanks again to everyone that came to visit and help with the build, I think the comment “It’s amazing that you can learn by holding a light” by Kim VK5FJ is both funny but very true !!!
 After pulling out the seats I found there was a heap of dirt and muck that had collected under the floor mat, along with evidence of a water leak from the front windscreen in both foot wells. While I was under the floor mat I also took the opportunity to remove unused wiring from different radio experiments, that had accumulated over the years. Cleaning up the floor pan certainly took a while.
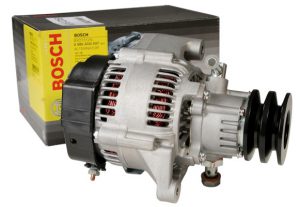 I don’t know why but Hilux Alternators don’t seem to last long. I’ve now had four Asian made OEM aftermarket alternators fitted to my Hilux over the past 7-8 years. They last just longer than the statutory warranty period and then fail.
 Just after I’d finished replacing the engine my windscreen wipers decided to call it day. Driving along a flat piece of road just before dark the wipers and washers decided to come on of their own accord with the switch in the OFF position.


 Well after some 392,000 km’s my Old 1996 Toyota Hilux decided to call it a day in rather spectacular fashion.