So it’s been a while since I’d looked at my ADLAM Pluto SDR project, to complicate matters I’ve also recently switched to Linux. So it was time to see if I could find new SDR software to drive it.
After a few false starts and some trials and tribulations, I finally settled on SDRangel. I’ve used this app before to demodulate a High Altitude Balloon payload that transmitted a quirky DVB-T modulator using a RTL-SDR and Ubuntu Laptop.
So the only problem, SDRangel is written to natively run on Ubuntu, Windows, Mac and the rest of the distros can either use a snap package or compile from source. Sigh. Linux Mint does not like snaps, LMDE uses only flatpak’s.
SDRangel Flatpak
Now I’m not a big fan of flatpak’s either, to me they are in the same boat as snaps and docker images, unnecessarily slow, however after reading how to compile SDRangel from source, a flatpak was certainly the fastest and easiest way to let me try the software and see if I can get this working.
Thankfully I found SDRangel on Flathub. The following was all I had to do from a command line to install the flatpak, installation instructions were found here.
$ sudo flatpak install flathub org.sdrangel.SDRangelAfter a short time downloading and installing it was ready.
SDR plugable UDEV Rules
SDRAngel requires udev rules to be added for the most common SDR’s, since I also intend to try RTL-SDR’s at some point, now as as good as any time to install.
The udev rules can be found here on the SDRangel GitHub repo. I simply downloaded them in a zip file to my local downloads directory, unzipped and moved them into /etc/udev/rules.d. There is an installation script (install.sh) in that same directory as the downloaded udev rules you can use or read for inspiration on the linux commands necessary.
If you find that you still can’t access these devices, check your user has the right permissions to use USB or network devices, trap for young players and outside the scope of this post. Google and Duck-Duck-Go has lots to say on this topic.
Flatpak Permissions
Before starting SDRangel I also loaded Flatseal and checked what permissions the SDRangel flatpak was requesting. Always pays to review flatpaks using Flatseal, I’ve found a few packages that had some very odd permissions and didn’t work on LMDE out of the box.
It makes sense to me to grant SDRangel access to the network, PulseAudio sound server, GPU acceleration (if used), All devices (i.e. SDR’s) and the “Run in Background” option. This is the config that worked for me, YMMV.
SDRangel Configuration
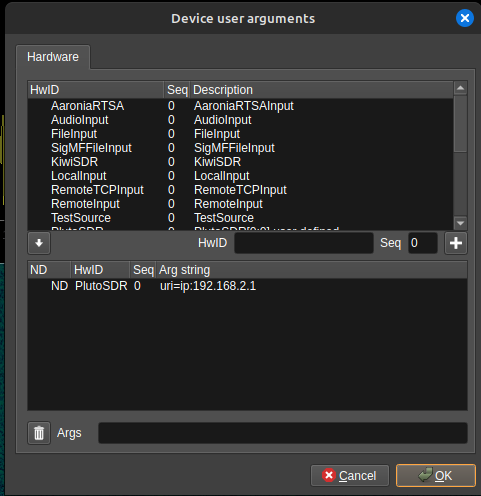
Once SDRangel is loaded, we’re greeted with a big blank screen. From here I added the ADLAM Pluto by clicking Preferences > Devices > User Arguments
I then added “PlutoSDR” in the HwID field, left seq as 0 and hit the ‘+” button which is the add symbol. I then selected the PlutoSDR entry in the lower pane, added “uri=ip:192.168.2.1” in the Args field, and hit OK. After I’d finished my config screen looked like this. Note my IP is the default PlutoDVB value, you can find what yours is set to in the config.txt file from the Pluto storage device it presents when connected to a PC. Now apparently you need to restart SDRangel for this to have any effect. YMMV.
Adding a RX Device
I then added an RX device by clicking on the menu button just to the right of the purple button with a play symbol in it. If you hover over each button, a pop up appears telling you what the button is. From the drop down box, I then selected the PlutoSDR entry which was right towards the bottom of the list.
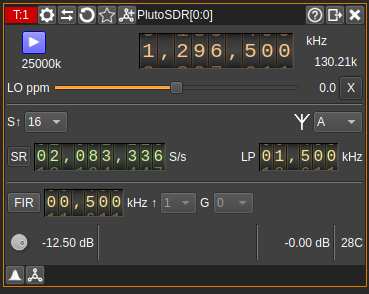
Two screens appear, but we’ll concentrate on them one at a time. I configured the Receive window like this, more info here;
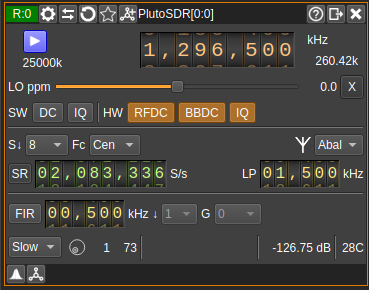
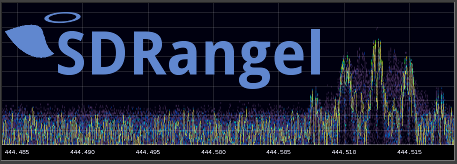
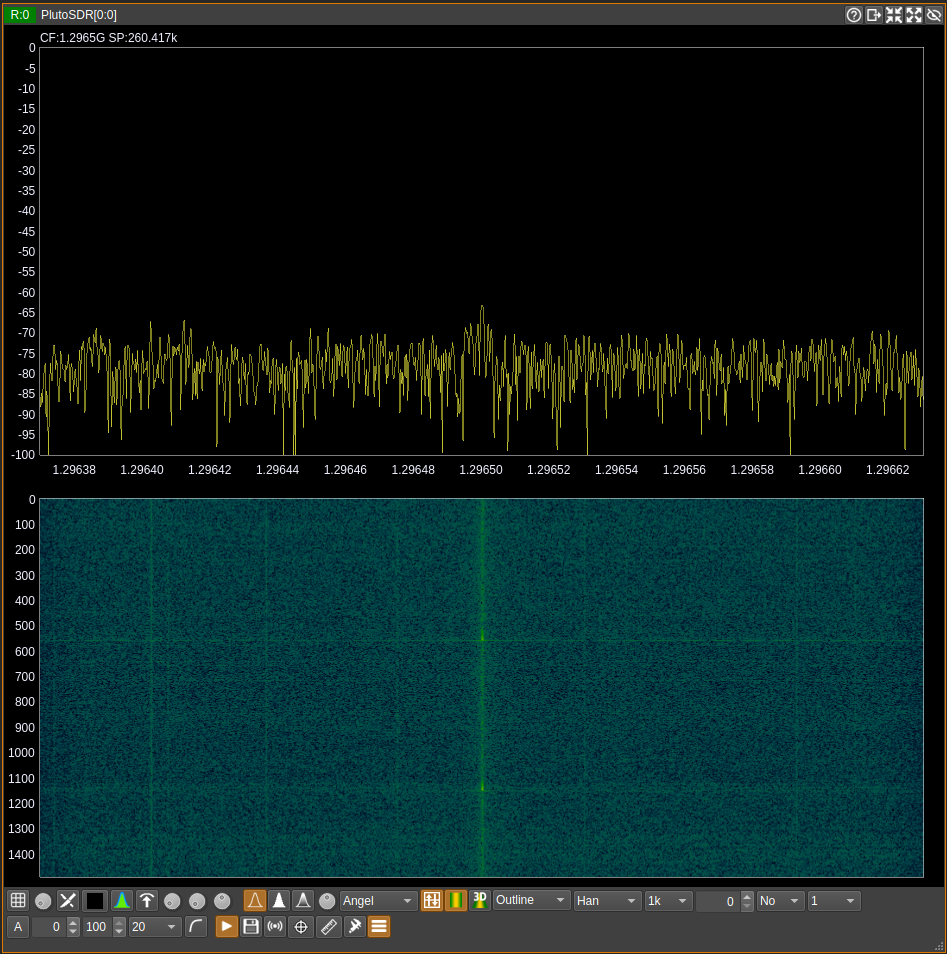
Now the thing to note. I’ve twiddled the sampling rate for reasons I’ll explain in another post. You should find the initial settings of 2.5MHz work well enough out of the box. I’ve increased the decimation from 1 to 8 in the S field, likewise I’ve selected “slow” AGC. If you then press the purple button with the white play symbol, you would see the next window start to do something interesting like this.
I didn’t change anything here, the out of the box config just worked for me. Now you might notice you don’t hear anything, that is because you have to add a channel/separate demodulator. On the receive window, just to the left of where “PlutoSDR[0:0]” appears is a button you can click to add a channel.
From the pull down box I’d choose the SSB Demodulator, which will appear on your screen. I configured it like this;
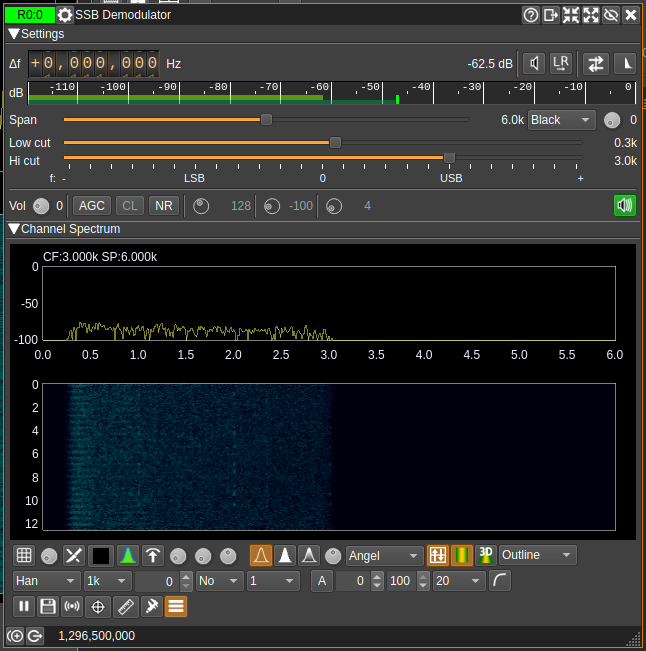
I had to play around with the sound settings, especially the audio settings which were hidden under the green speaker symbol (right click) on the right side of the screen just above the Channel Spectrum display. It is worth spending the time to read the documentation on the SDRangel website, once you realise that each part is a software plugin and how configurable this system is things get more interesting.
By the time we have the receiver configured, the spectrum display happening and a channel defined, audio should be appearing out of your speakers. If not then you’ll need to spend a bit more time debugging what’s happened with PulseAudio, mine just came to life.
I’ll also mention that if you try the Narrow Band FM channel plugin, there is a hidden squelch power threshold setting, that you need to wind down to -100 for it to open the squelch and produce white noise. It’s just to the right of “Sq” and a funny button with a triangle on it, you’ll see what I mean.
Adding a TX Device
I’m not going to reinvent the wheel here. I found a great article on the web and a video on YouTube from SignalsEverywhere that explained how to configure the ADLAM Pluto to transmit. You can find the original article from the RTL-SDR site here and the video embedded below;
Putting it all together
To prove that I could get this all working, I put the receiver on 1296.5MHz with the settings previously shown. I configured the transmitter slightly differently adding further decimation to reduce the effective bandwidth. You can see this below;
I then added a Narrow Band Modulator, by clicking the button just to the left of where “PlutoSDR[0:0]” appears in the menu bar (just like a channel button in a receive window) and selecting NFM Modulator from the drop down box. You then configure like so, based entirely on SignalsEverywhere’s YT video.
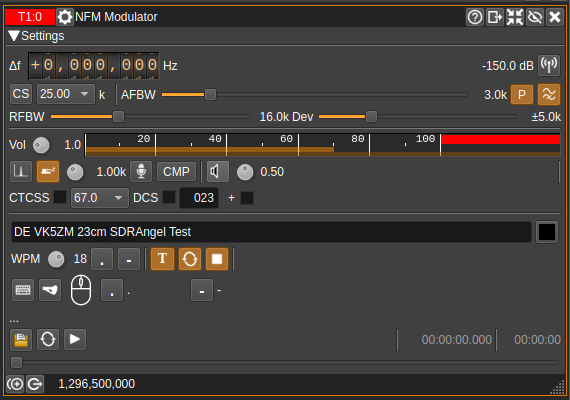
If you click on the purple button with the white triangle on the TX window, you should be greeted by CW being sent. Just so there was proof, I made and uploaded my own video.
In the above video the audio is being demodulated by the Icom R10 on 1296.5MHz NBFM just so that there was a “Real Radio (TM)” involved. The ADLAM Pluto is transmitting approximately 0dBm into a dummy load. The ADLAM Pluto receiver is displaying the received signal and waterfall, I didn’t bother with a channel/demodulator to listen to my own transmission, the R10 was doing a good enough job on it’s own.
So now that I’ve got that working, I can start to experiment with the ADLAM Pluto and some microwave multipliers to get me up into the higher bands. I also need to check it will still key the Pluto Charon kit and modify as necessary. More to this story shortly.