One of the “new to me” things my Nereus has come with is a heat exchanger. The heat exchanger allows the inboard engine to be cooled much like a radiator except the coolant is not cooled by air but by raw sea water instead.
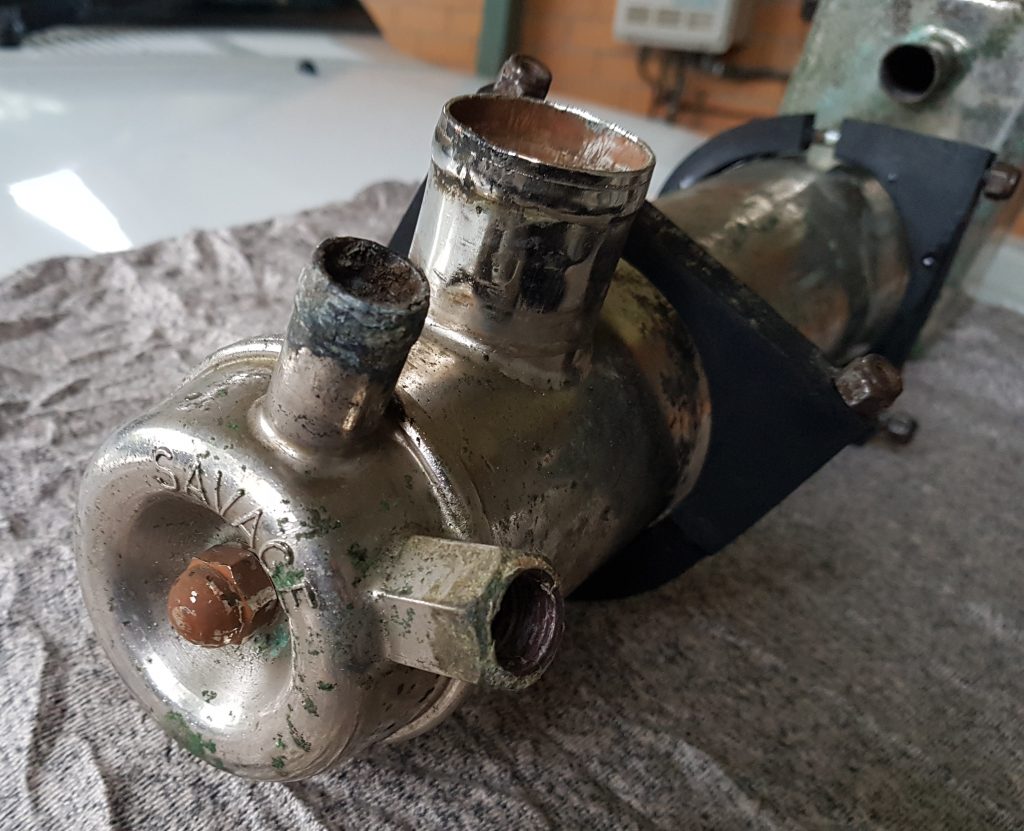
To the side is a picture of the heat exchanger in situ. The upper larger hose is where the coolant enters the heat exchanger and the coolant pump draws water from the bottom. The raw water cunningly runs the other way to ensure maximum heat transfer. So raw water enters at the bottom and exits from just under the top tank.
In all of our previous inboard boats the raw water (sea or fresh) was pumped through the engine block before being discharged into the wet exhaust. Running raw sea water in any engine is not a good idea for two reasons;
- Salt can be deposited out of solution when it is heated above +68degC
- Salt water is rather corrosive to things like Iron and Aluminium
So in the case of a raw water cooled cast iron engine the coolant galleries will over time get caked in salt deposits or holes develop in the block where you don’t want them to which ultimately leads to premature engine failure. This is not so much of a problem for boats run in fresh water. Having a heat exchanger doesn’t prevent raw water salt deposits from high temps, but at least periodically we can service the heat exchanger and make sure the raw water tubes are kept clear. There are also special solutions that can be purchased to dissolve these deposits, something I’ll be looking at soon.
However not having had a heat exchanger before I had no idea what maintenance was necessary. Thankfully I was able to find a name plate on the heat exchanger which lead me to the manufacturer and model a Savage MK1 Compact built across the pond in New Zealand.
I was also pleased to find they had a local Australian distributor Luxfords in Victoria. It is not often you find distributors that are happy to assist customers with old products, so it was pleasant to say the least when I gave them a ring and received a healthy dose of good ol’ fashioned service. Kudos indeed ! So after my quick phone call I had all of the parts necessary to refurbish my heat exchanger delivered to me in a couple of days.
So the team at Luxfords suggested that I replace the sacrificial anode, an o-ring seal and a couple of washers made from nylon. However firstly I had to get it out of the boat. Here’s a photo of the unit in situ and once extracted, this turned out to be a marathon with some of the bolts requiring patience to get them undone due to restricted access;
Removed from Boat 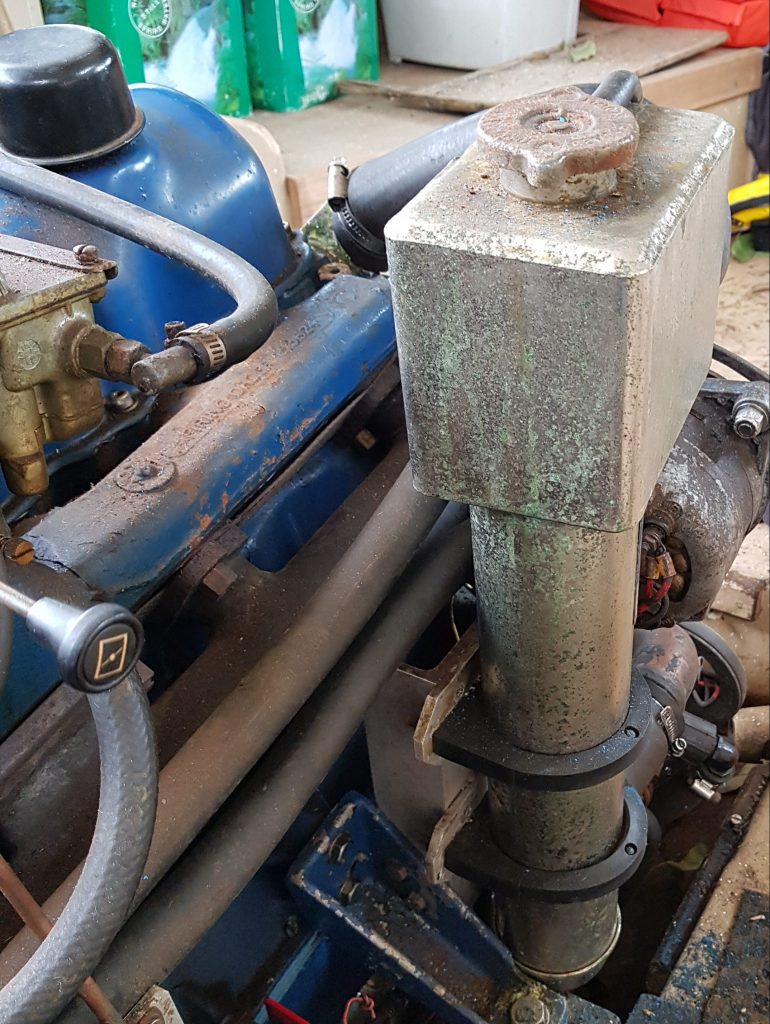
Heat Exchanger in Situ
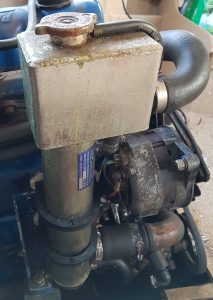
So it turns out the heat exchanger is nickel plated copper not stainless as I first guessed, so there has been some form of corrosion on going on that resulted in the tarnished green appearance. Nothing a light slight scrub with steel wool couldn’t remove. It would also appear that the rubber on the clamps that hold the heat exchanger had perished and were split, so once again a phone call to Luxfords and they came to the rescue with the new clamps.
Once the unit was extracted from the boat I was able to find two captive head nuts that then allowed me to separate the bottom cap from the upper tank and main body of the unit.
This was where the fun really began.
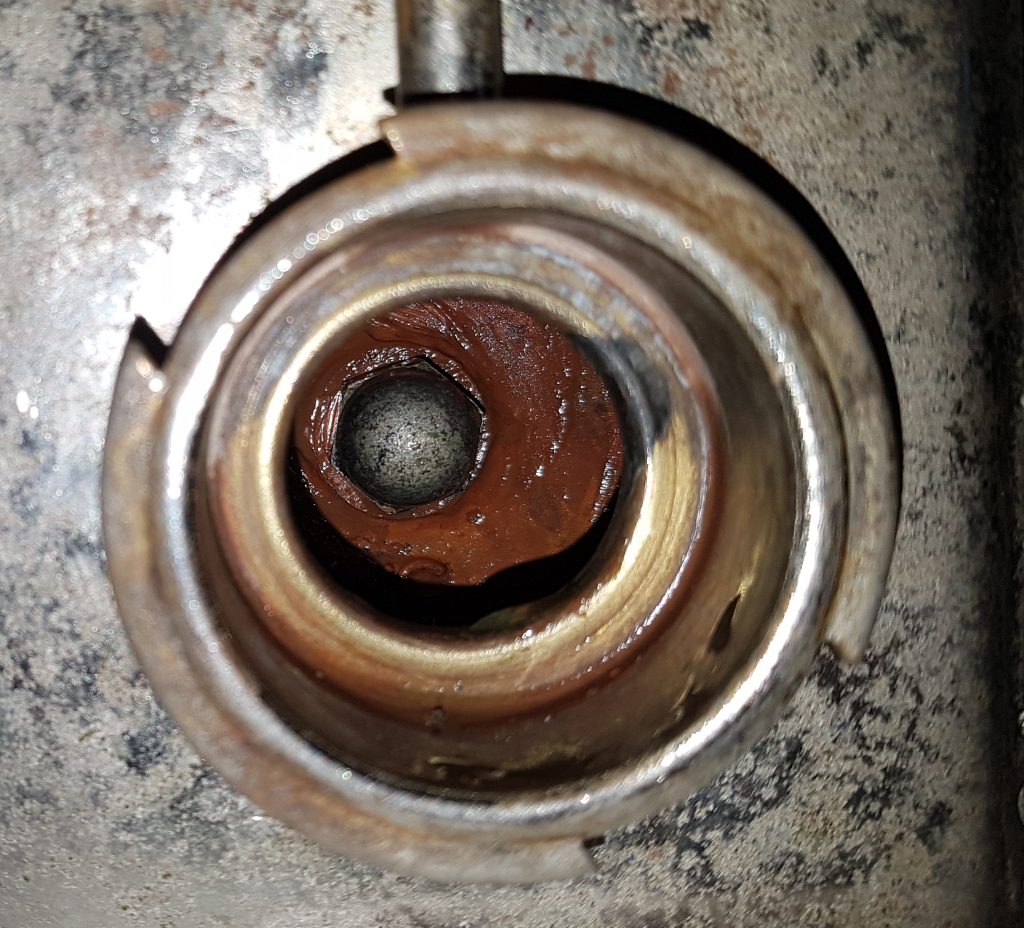
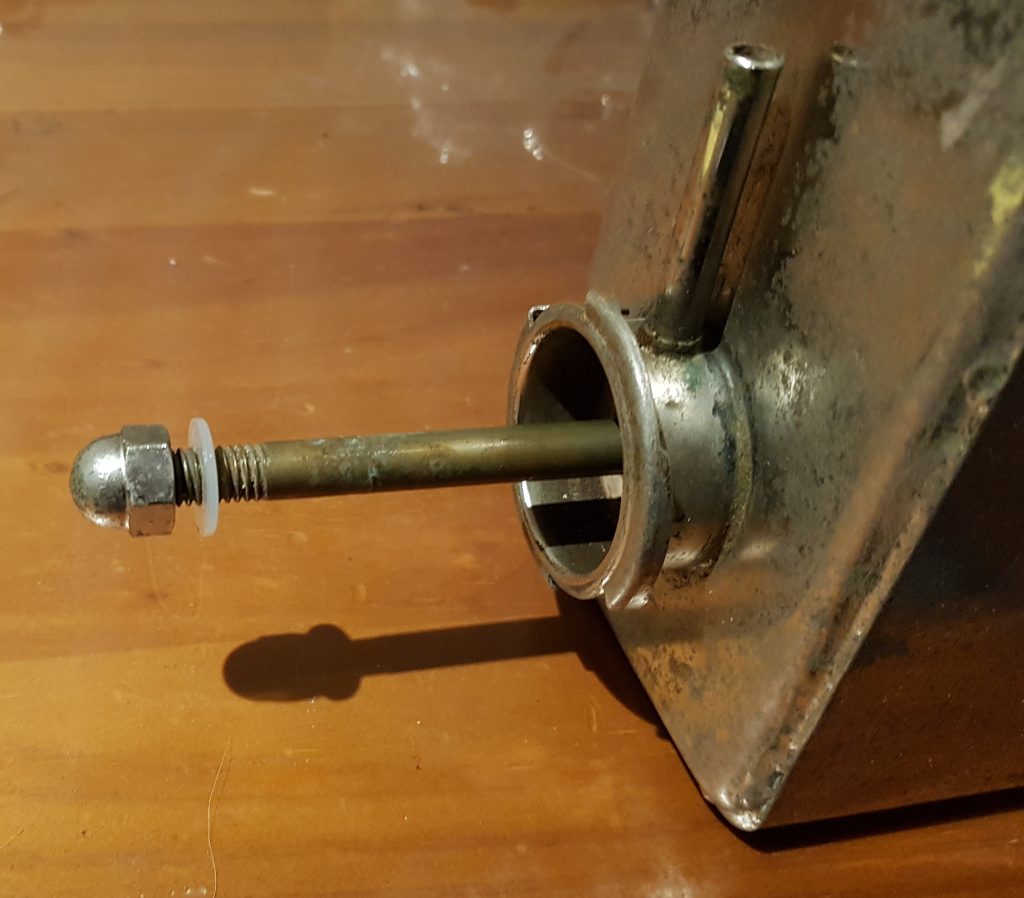
One of these captive nuts is found within the header tank that holds the coolant and once removed I found a brass rod that runs between the coolant tank at the top and raw sea water cavity in the bottom. As you can see in the images below it was the lower nut that decided that it would undo.
Coolant Tank 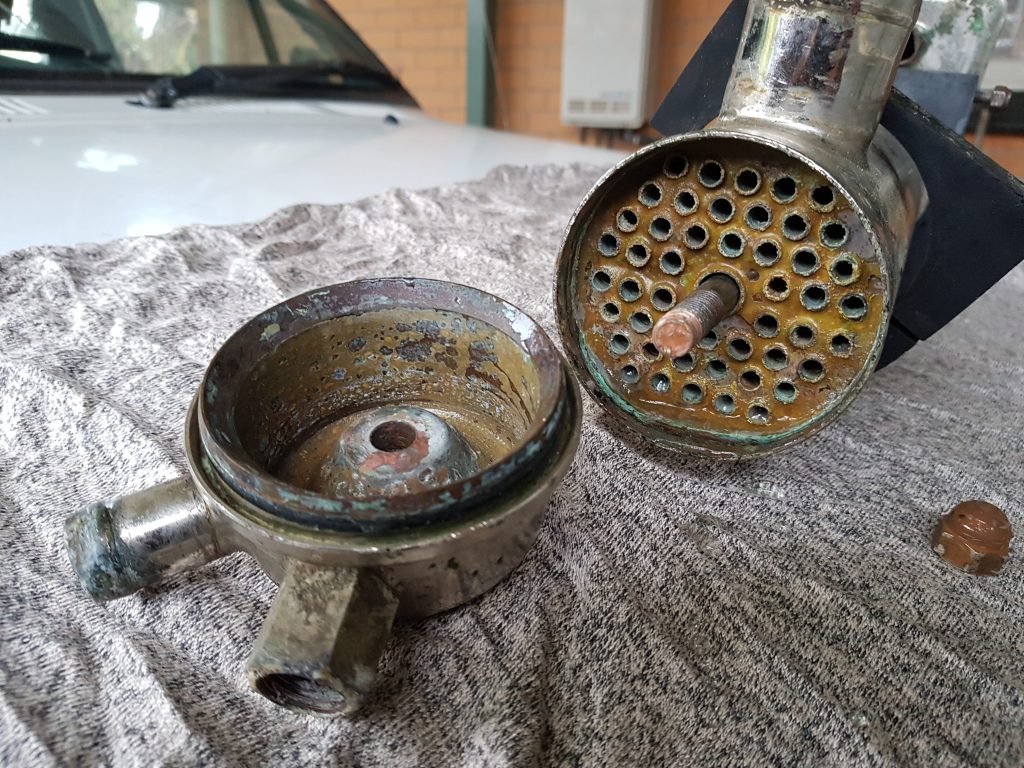
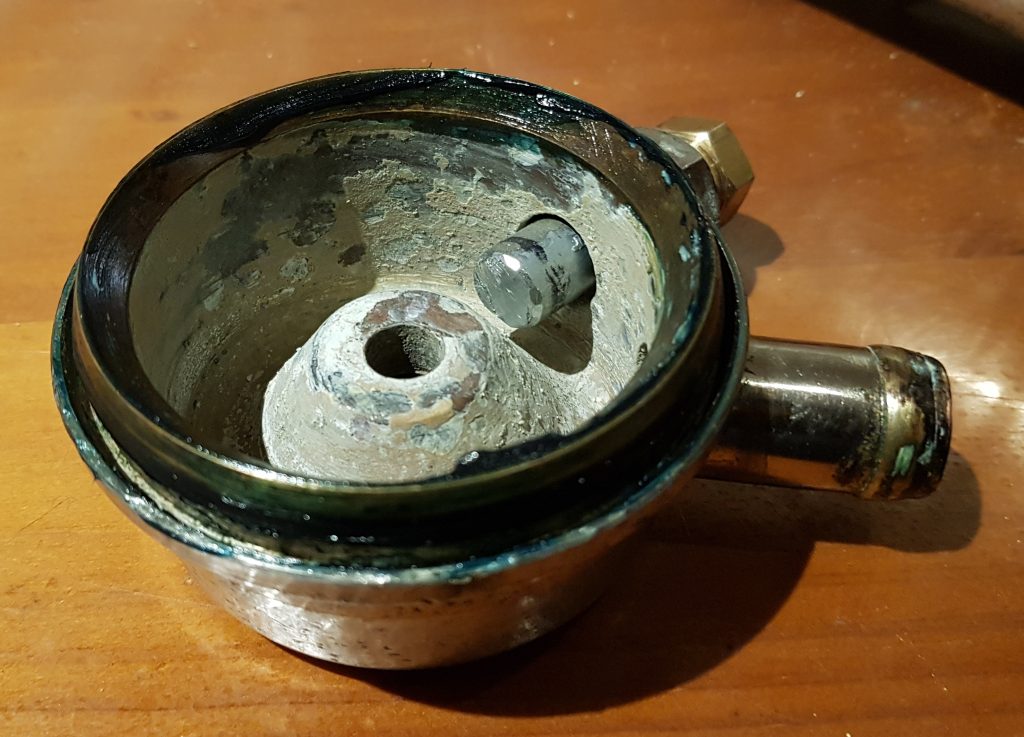
Raw Water Cavity
It was now very clear what the nylon washers were for, one of these washers was supposed to provide the seal between the two cooling systems, meaning the raw sea water and engine coolant.
It was a little horrifying to find that the heat exchanger unit didn’t have one fitted. Gulp.
It may very well have been serviced in the past and it was overlooked, perished or removed. This meant the only seal between these two chambers was bring provided by a metal to metal surface, phew yet another bullet dodged.
So digging further through the spares kit I’d been supplied, I still had a second nylon washer, 3″ o-ring and a sacrificial anode. The o-ring was easy that went on the lower cap and sealed this and the main tube. I was then guessing the second nylon washer went under second captive nut again to seal the raw water chamber at the bottom. That just left the sacrificial anode.
New “shorter anode” installed 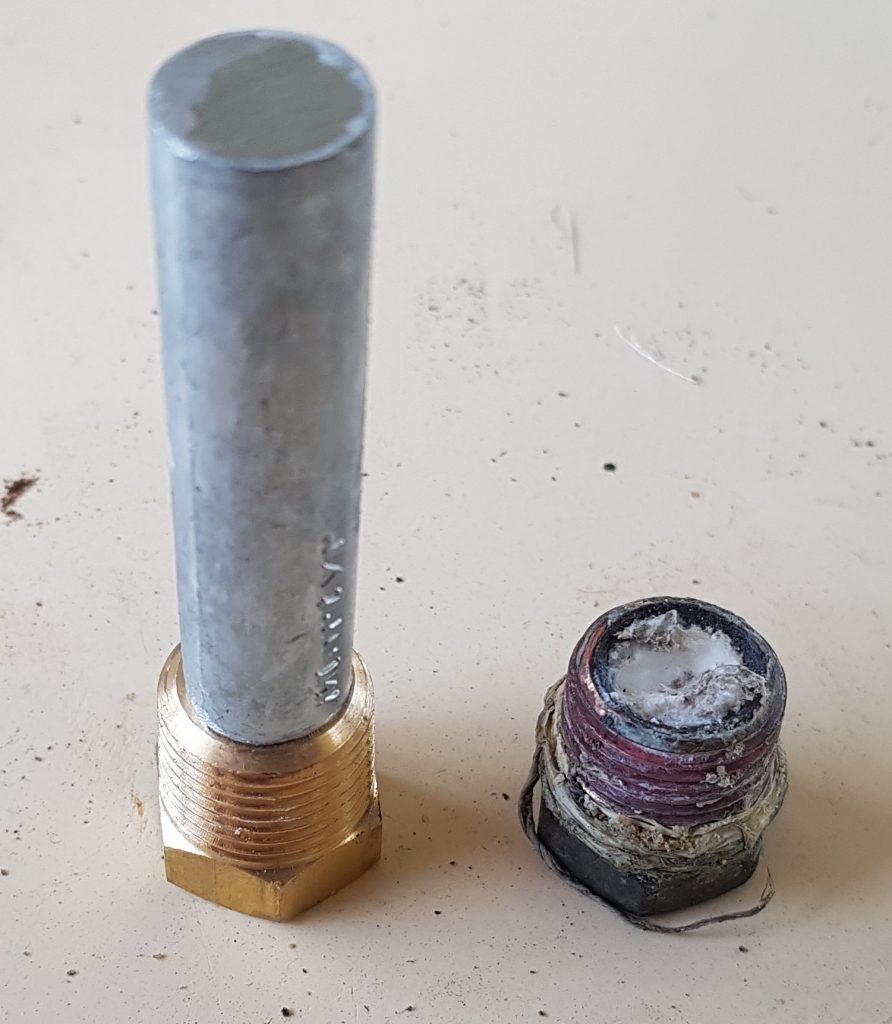
New vs Old Sacrificial Anode
As you can see In the pictures above there wasn’t much of the old sacrificial anode left before things got hairy. The compact heat exchanger requires the anode to be trimmed slightly (approx 15mm) to fit, which was easily done with a junior hacksaw. This was reinstalled with a bit of thread tape to make sure it too didn’t leak. I’ll be pulling this anode out every service interval to inspect, it certainly won’t ever get that short again.
When reassembling I did not forget to include the nylon washer under the captive nut of on the threaded rod that sits inside the tank, I even took a photo to make sure I didn’t forget.
Then it was a simple matter to clean up and reassemble the unit read to go back into the boat. In the photo below you can clearly see the raw water inlet and outet. As a precaution I put a little marine grease on the lower o-ring around the lower cap to ensure it wasn’t pinched by the outer tube when inserted. Below is a picture of the unit awaiting re-installation including its new clamps.

Once back in the boat I need to pressure test the raw water and make sure it does not leak into the coolant tank. Then it will easy to fill the engine with cooland and run the engine to check everything works.
Now it’s time to tackle the alternator and electrical systems.