For quite some time I’ve been promising my eldest son his own bedroom. However like everything, this is somewhat complicated and has taken far longer than expected. To make this happen, I’ve had to make more shelving in the shed, move stuff stored in the garage out into the shed, clean out the garage and move my office, which was in the 3rd bedroom of the house out into the garage soon to become my new man-cave. I’ve felt like I’ve been playing musical chairs with storage boxes for quite some time. Then there is the time required to renovate said 3rd bedroom back into a teenagers retreat, so much work, so many weekends, I still hate painting.

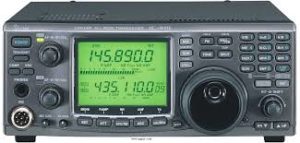
However, while moving things out of the office and into the new man-cave I rediscovered the Pluto Charon kit, languishing in a forgotten project box. My original plan was to use this kit as my 23cm home station, however during the above renovations a member of my radio club offered me a pristine Icom IC-910H with 23cm module which I couldn’t refuse. Needless to say the Pluto Charon priority and urgency was pushed back somewhat.
Fast forward two years and having rediscovering this kit, along with seeing the new 12cm Pluto Styx kit available (click) and a teaser for the 6cm Pluto Nix, well it was time to finish it and continue working my way up through the microwave bands.

This kit requires the usual SMD microwave construction techniques, so fine solder a good iron, a steady hand and optical magnification is an absolute must. The Mini-kits instructions and support page are as usual first class. However one should heed the warning on the website ordering page that “this kit is not for beginners and requires very experienced soldering skills”.
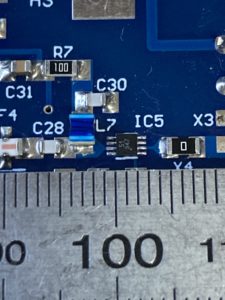
I generally found the majority of the kit straightforward, until I got to IC5 which is a BGU8051 preamp from NXP. You should check out it’s specs on the NXP website. This is one of those “looks big on the computer screen” kind of parts that even designers get caught out with when ordering their first samples. I’ve included a photo, along with a strategically placed steel ruler for scale. That IC is tiny… really tiny !!!
At just two by two by three-quarters of a millimeter with eight pins, it was clear that this was not going to be soldered by any ordinary soldering iron. Thankfully I have a hot-air rework station, so I manually pasted the board with an I-Extruder, used plenty of flux and re-flow soldered the device to the board. Since inductor L7, capacitor C30 and resistor X3 were so close, I chose to leave these off until I had soldered IC5 to give me room and ensure the hot air did not cause unnecessary stress to adjacent components, YMMV. I also typically use a T3 solder paste for the majority of my kit building, but for this board I resorted to using T4 since you could nearly count the number of solder balls dispensed onto each pad of IC5. However I’m happy with the result and with the right tools this kit can be assembled at home. There are many YouTube tutorials on how to solder with hot-air worth watching as well.
Once I had the kit soldered together I then turned my attention to how I was going to put it in a box and begin to test it. However that is for the next post !
