 I’ve been doing a lot of PCB assembly of late both re-flowing SMD in a toaster oven and a heap of hand soldering. One thing that bugs me is cleaning up the various rosin’s, flux and solder paste without making a bigger mess.
My usual clean up method is to use IPA and cotton buds, however the IPA has a nasty habit of dissolving the flux/rosin/paste and redistributing it across the surface of the PCB making a slightly tacky mess worse than when I started. Dang it ! I then resort to using cotton make up removal pads (stolen from the medicine cupboard) and with a blotting technique try to pick up as much of the mess as I can with copious amounts of IPA. There simply has to be a better/cheaper/simpler way !
So after speaking to a few production Engineers at work I was pointed towards various brands of PCB wash and the suggestion was made to use an ultrasonic cleaner. A bit of poking around the internet suggested that a good ultrasonic cleaner could be had for less than A$200 and PCB wash should be A$15 to A$20 per litre.
 Thankfully my local Jaycar had both locally available which makes supply and warranty much easier. I also like supporting my local shops where I can.
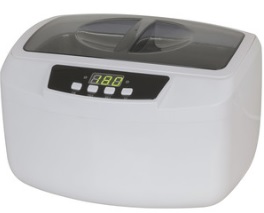
The ultrasonic unit I purchased can be found here (click), part number YH5412. It has a total transducer power of 160W and a tank that can hold up to 2.1L of liquid. This unit is manufactured in China and if you look carefully you’ll see the same OEM unit on various sites all for about the same price. This is certainly big enough to hold quite large PCB’s up around 250mm x 150mm and has an inbuilt heater as a bonus.
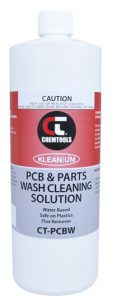 The PCB wash was yet another story. This stuff is far cheaper in large quantities but I just wanted a little bit to see how we go. So I found Jaycar also sold 1L bottles from Chemtools which you can find here (click), part number NA1070. This stuff is biodegradable which means it should be ok to go down the sink, however I’ve got some 5L bottles I can decant the used liquid into and dispose of at the local EPA as required. All of the technical stuff can be found on the Chemtools website here (click). It’s worth reading the TDS and SDS sheets of this stuff and making sure you take the necessary precautions.
So to clean some PCBA’s !
I filled the machine to it’s minimum level (~700ml) and turned on the heater. Within 10 minutes the fluid was warm (not hot) so I turned off the heater and loaded a number of small PCB’s into the fluid, being careful not to overlap the boards. The TDS for this PCB wash says the fluid can be heated to +40 degrees Celsius but is designed to work between 20-30 degrees Celsius. So I just used it warm, not hot. I ran the unit for 180 seconds (one of the presets) with the lid on. The ultrasonic cleaner certainly made the right noises and there were lots of little bubbles ripping into the contaminants. I really like the lid on this unit as a warm liquid evaporates and with the lid on there was certainly condensation under the lid keeping everything in.
Once the countdown timer expired it was into one bowl of distilled water and then rinsed again in a second smaller bowl of distilled water. I had a spare pair of plastic tongs I could use to move the PCB’s between tanks without using fingers. The idea of the two baths is to get the bulk of the PCB wash off in the first bowl and then the last dregs off in the latter. It helps to change the water in the first bowl often, since it takes the bulk of the PCB wash off in the first instance.
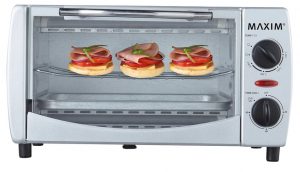
Then it was into the drying cupboard at 50 degrees Celsius for 40 minutes to evaporate the last of the water off the board. My drying cupboard is a 20L toaster oven that I used to use for reflow soldering, nothing high tech but it will idle along at 50 degrees nicely unlike other ovens I’ve tried. I’ve seen videos online where others have used a paint stripper gun to blow hot air across the boards, YMMV.
So the result ? I’m impressed. Quite simply impressed with how clean the boards have come out of this very simple process. They are now clean and you’d be hard pressed to tell that they didn’t come from a professional board loader. Inspecting the results under the microscope I see there is very little residue on the boards, both the flux and rosin from the hand soldering processes have been completely removed. There is no trace of any solder paste balls either. They are clean as a whistle.
I will have to work out a way to take photo graphs down my microscope to show the results, my feeble attempts at trying to take a macro shot with my phone failed dismally.
Now I have to hurry up with the Whizoo controller and my smaller 9L toaster oven conversion. Must remember to blog that too.