For a while now I’ve been meaning to investigate the Message Queuing Telemetry Transport protocol or MQTT as it’s more commonly known. While the protocol is nearly 20 years old it has become increasingly popular with the Internet of Things (IoT).
The original MQTT code was donated by IBM and Eurotech to the Eclipse Paho project more than 10 years ago now and since then has been extended and massaged into what is known as Mosquitto today. I also like that Eclipse have done a lot of work writing clients for a great many platforms making the developers job just that much easier. A few of my friends have used it professionally so it comes recommended and seems like a good place to start.
So I wanted to experiment with this on a Raspberry Pi (there is a plan more on this later!), so after a bit of googling I found a nice guide written by Adafruit (click) that was the basis of what I used to setup my MQTT stack.
The following is what I needed to do to install Mosquitto on a stock installation of Raspbian Buster Lite. The Mosquitto package is available pre-compiled for ARM in the Debian repo’s so that makes life much easier;
The configuration above is just a basic one for testing. It is by no means secure or ready for production systems, you have been warned. Once the config has been written the following two commands can be used to start Mosquitto and check it is actually running;
$ sudo systemctl start mosquitto.service
$ sudo systemctl status mosquitto.service
There are small apps that can be used to throw data into the MQTT broker and create topics to publish and subscribe data to and from. Once I’ve worked this out for myself I’ll throw something here.
One of the “new to me” things my Nereus has come with is a heat exchanger. The heat exchanger allows the inboard engine to be cooled much like a radiator except the coolant is not cooled by air but by raw sea water instead.
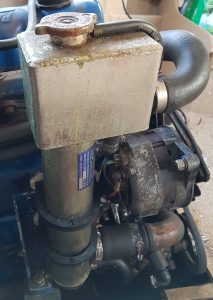
To the side is a picture of the heat exchanger in situ. The upper larger hose is where the coolant enters the heat exchanger and the coolant pump draws water from the bottom. The raw water cunningly runs the other way to ensure maximum heat transfer. So raw water enters at the bottom and exits from just under the top tank.
In all of our previous inboard boats the raw water (sea or fresh) was pumped through the engine block before being discharged into the wet exhaust. Running raw sea water in any engine is not a good idea for two reasons;
Salt can be deposited out of solution when it is heated above +68degC
Salt water is rather corrosive to things like Iron and Aluminium
So in the case of a raw water cooled cast iron engine the coolant galleries will over time get caked in salt deposits or holes develop in the block where you don’t want them to which ultimately leads to premature engine failure. This is not so much of a problem for boats run in fresh water. Having a heat exchanger doesn’t prevent raw water salt deposits from high temps, but at least periodically we can service the heat exchanger and make sure the raw water tubes are kept clear. There are also special solutions that can be purchased to dissolve these deposits, something I’ll be looking at soon.
However not having had a heat exchanger before I had no idea what maintenance was necessary. Thankfully I was able to find a name plate on the heat exchanger which lead me to the manufacturer and model a Savage MK1 Compact built across the pond in New Zealand.
I was also pleased to find they had a local Australian distributor Luxfords in Victoria. It is not often you find distributors that are happy to assist customers with old products, so it was pleasant to say the least when I gave them a ring and received a healthy dose of good ol’ fashioned service. Kudos indeed ! So after my quick phone call I had all of the parts necessary to refurbish my heat exchanger delivered to me in a couple of days.
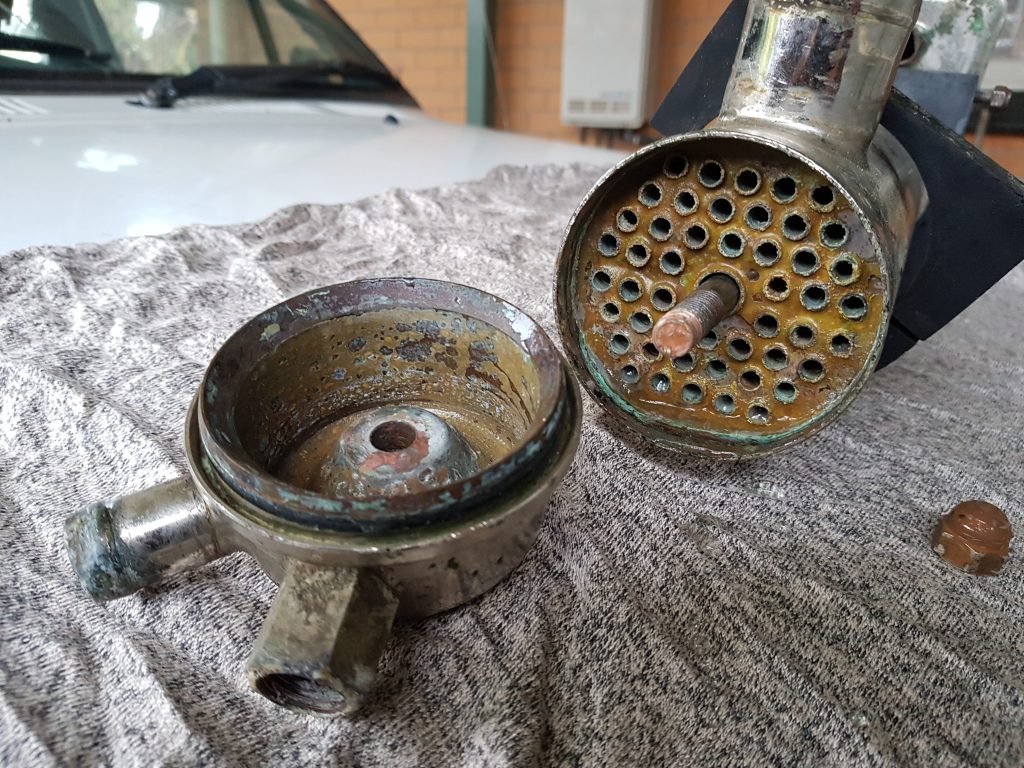
So the team at Luxfords suggested that I replace the sacrificial anode, an o-ring seal and a couple of washers made from nylon. However firstly I had to get it out of the boat. Here’s a photo of the unit in situ and once extracted, this turned out to be a marathon with some of the bolts requiring patience to get them undone due to restricted access;
Removed from Boat
Heat Exchanger in Situ
So it turns out the heat exchanger is nickel plated copper not stainless as I first guessed, so there has been some form of corrosion on going on that resulted in the tarnished green appearance. Nothing a light slight scrub with steel wool couldn’t remove. It would also appear that the rubber on the clamps that hold the heat exchanger had perished and were split, so once again a phone call to Luxfords and they came to the rescue with the new clamps.
Once the unit was extracted from the boat I was able to find two captive head nuts that then allowed me to separate the bottom cap from the upper tank and main body of the unit.
This was where the fun really began.
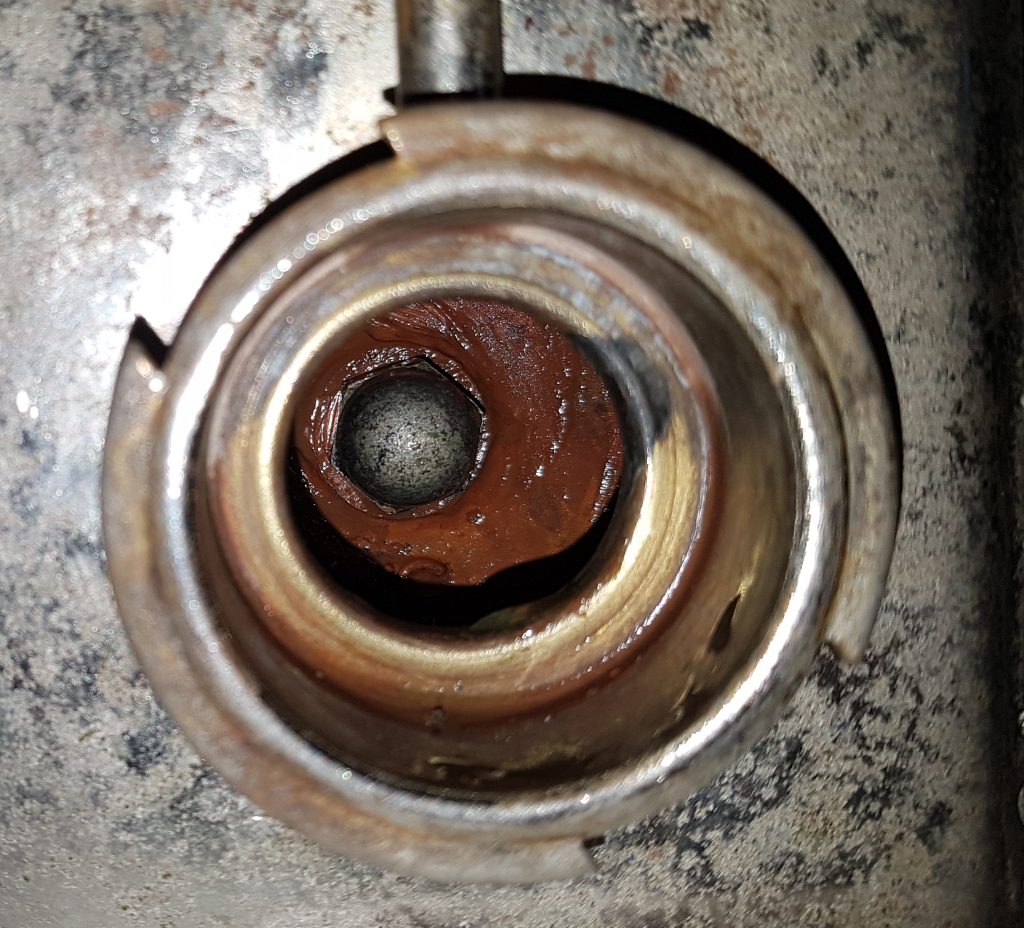
One of these captive nuts is found within the header tank that holds the coolant and once removed I found a brass rod that runs between the coolant tank at the top and raw sea water cavity in the bottom. As you can see in the images below it was the lower nut that decided that it would undo.
Coolant Tank
Raw Water Cavity
It was now very clear what the nylon washers were for, one of these washers was supposed to provide the seal between the two cooling systems, meaning the raw sea water and engine coolant.
It was a little horrifying to find that the heat exchanger unit didn’t have one fitted. Gulp.
It may very well have been serviced in the past and it was overlooked, perished or removed. This meant the only seal between these two chambers was bring provided by a metal to metal surface, phew yet another bullet dodged.
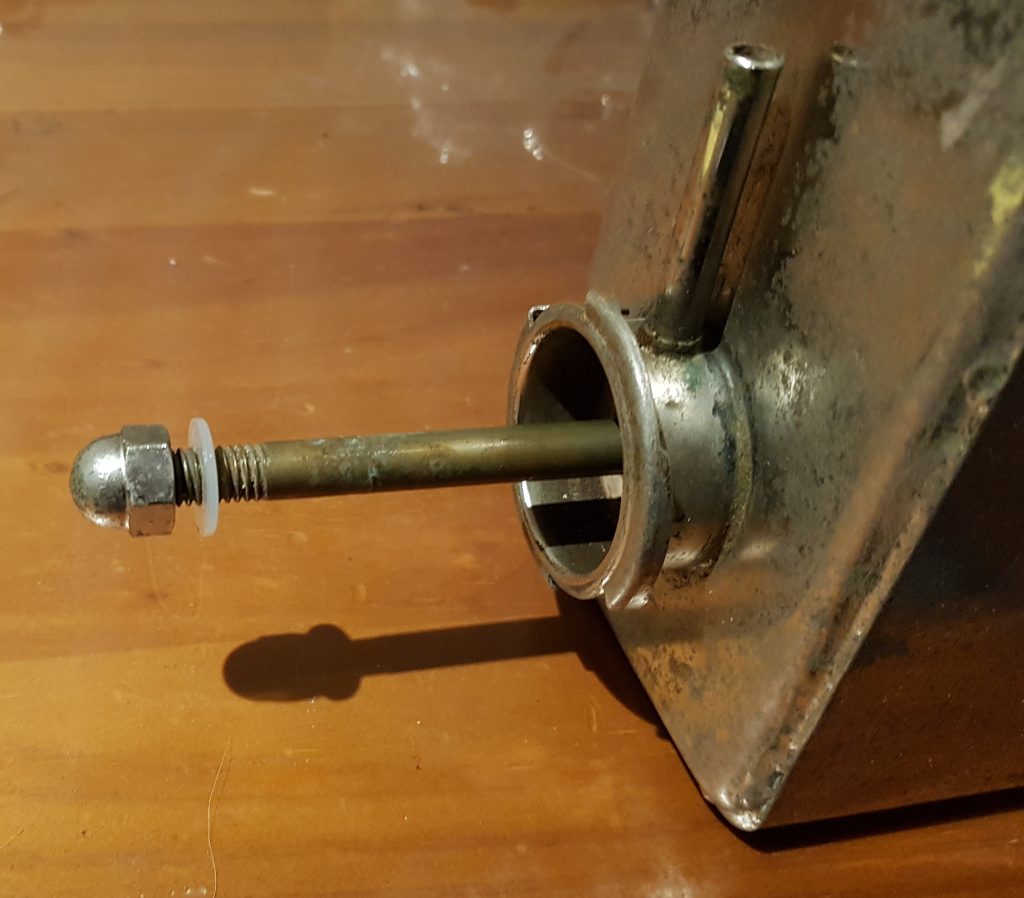
So digging further through the spares kit I’d been supplied, I still had a second nylon washer, 3″ o-ring and a sacrificial anode. The o-ring was easy that went on the lower cap and sealed this and the main tube. I was then guessing the second nylon washer went under second captive nut again to seal the raw water chamber at the bottom. That just left the sacrificial anode.
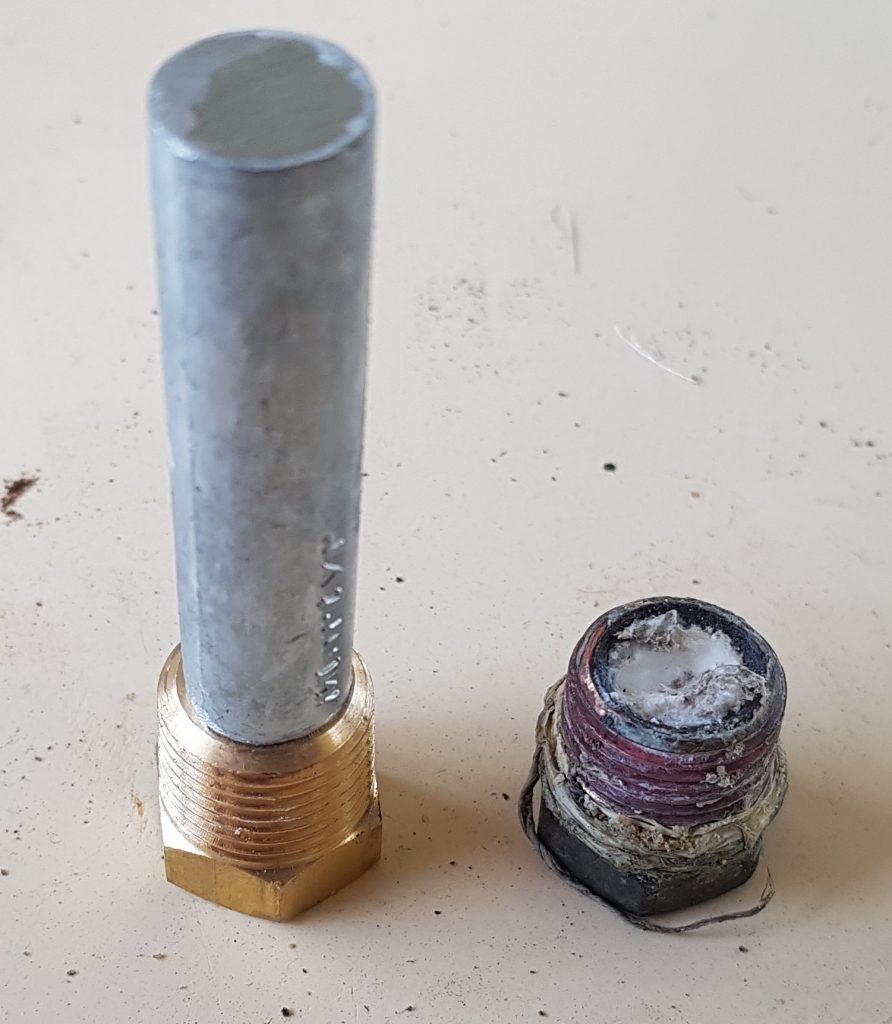
New “shorter anode” installed
New vs Old Sacrificial Anode
As you can see In the pictures above there wasn’t much of the old sacrificial anode left before things got hairy. The compact heat exchanger requires the anode to be trimmed slightly (approx 15mm) to fit, which was easily done with a junior hacksaw. This was reinstalled with a bit of thread tape to make sure it too didn’t leak. I’ll be pulling this anode out every service interval to inspect, it certainly won’t ever get that short again.
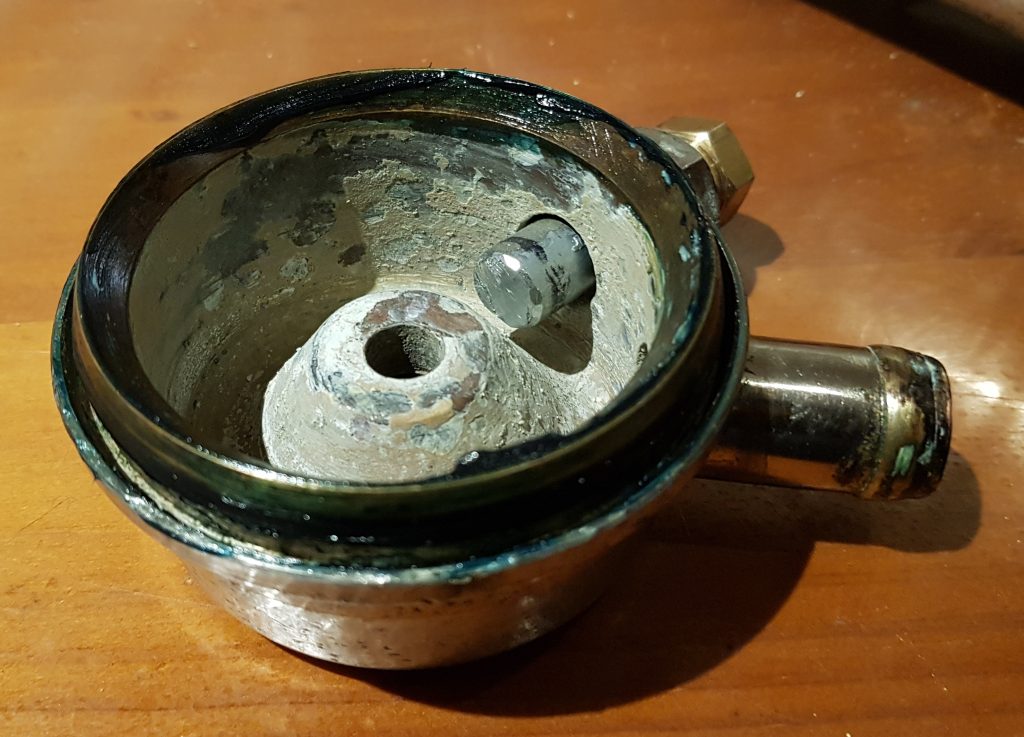
When reassembling I did not forget to include the nylon washer under the captive nut of on the threaded rod that sits inside the tank, I even took a photo to make sure I didn’t forget.
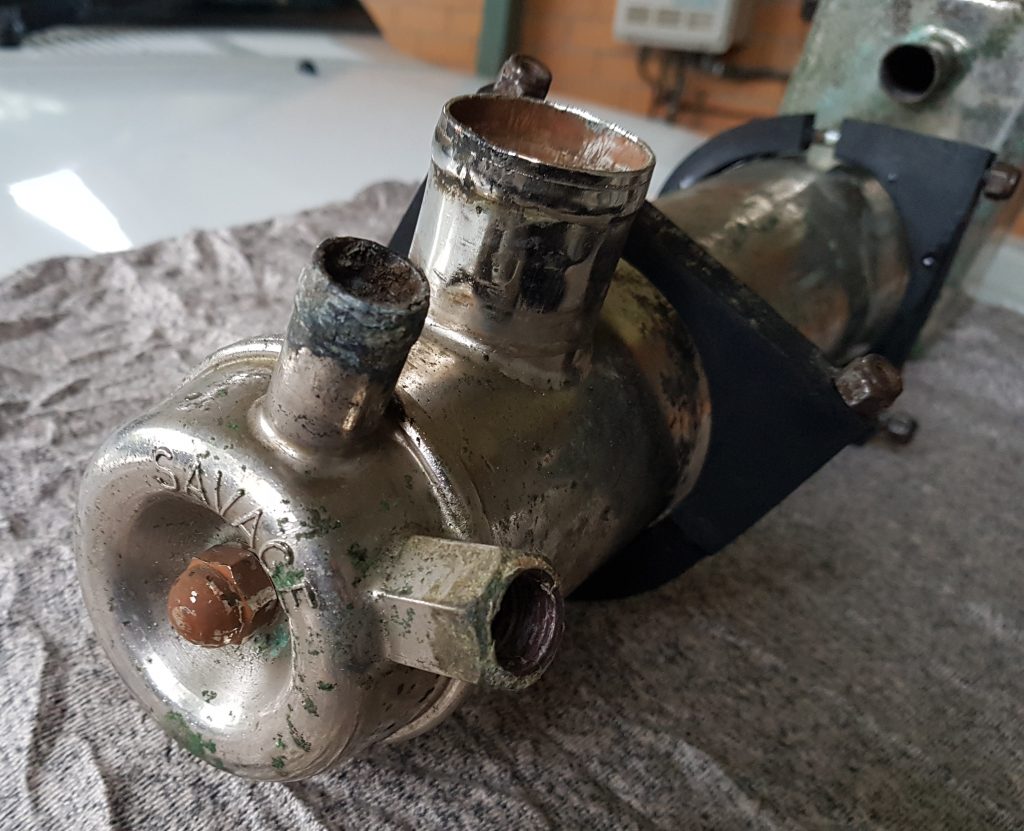
Then it was a simple matter to clean up and reassemble the unit read to go back into the boat. In the photo below you can clearly see the raw water inlet and outet. As a precaution I put a little marine grease on the lower o-ring around the lower cap to ensure it wasn’t pinched by the outer tube when inserted. Below is a picture of the unit awaiting re-installation including its new clamps.
Once back in the boat I need to pressure test the raw water and make sure it does not leak into the coolant tank. Then it will easy to fill the engine with cooland and run the engine to check everything works.
Now it’s time to tackle the alternator and electrical systems.
While changing the oil in my Nereus I was watching the temperature gauge and noticed that the engine temperature would warm up to 95 degrees before the thermostat would open, once open the temperature would drop markedly to 80 degrees before finally settling at 85 degrees. It was quite clear that the thermostat was faulty if not on the way out. There was no way I could leave it like that.
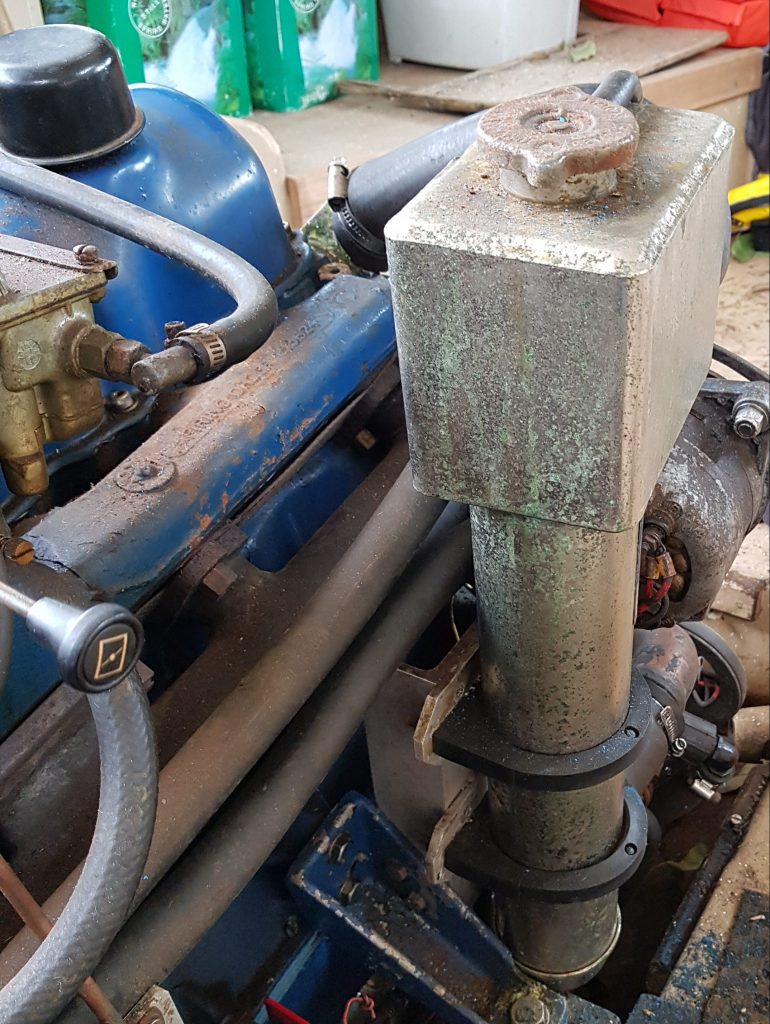
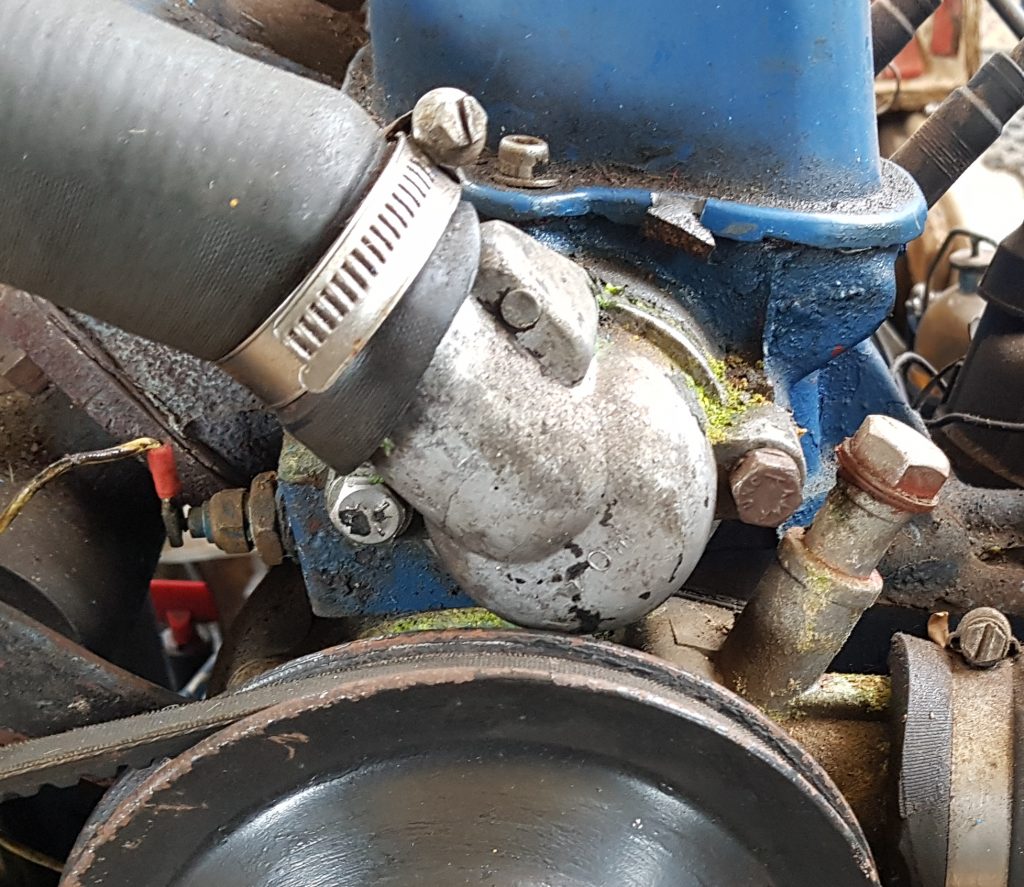
Since this boat has a heat exhanger the thermostat is the same as used in a car so replacement parts shouldn’t be hard to get from the auto parts store. The thermostat is hidden behind the usual cover at the front of the engine;
It also looked like the gasket was not sealing well with evidence of a small leak having occurred at some point. The downside of replacing the thermostat it would require the coolant to be drained, so it’s was also time to also service the heat exchanger and kill two birds with the one stone. Note to self I need to find out what’s required here.
The first surprise upon pulling the bolts out of the old thermostat cover was the bolt on the port side was mild steel and was only being held by three turns, it was a little short. The other starboard side bolt was stainless and much longer (32mm cf 25mm). A quick confirmation with a set of vernier calipers told me the right length was 32mm. Now this engine is from the period where metric and imperial co-existed in Australia. So it was highly likely the bolt as 5/16 imperial and not 8mm metric. So a quick measurement with a thread gauge confirmed it was a 5/16 UNC 1 1/2″ long bolt that also required a split washer, so off to the bolt shop we go I don’t have much in the way of imperial bolts in my workshop.
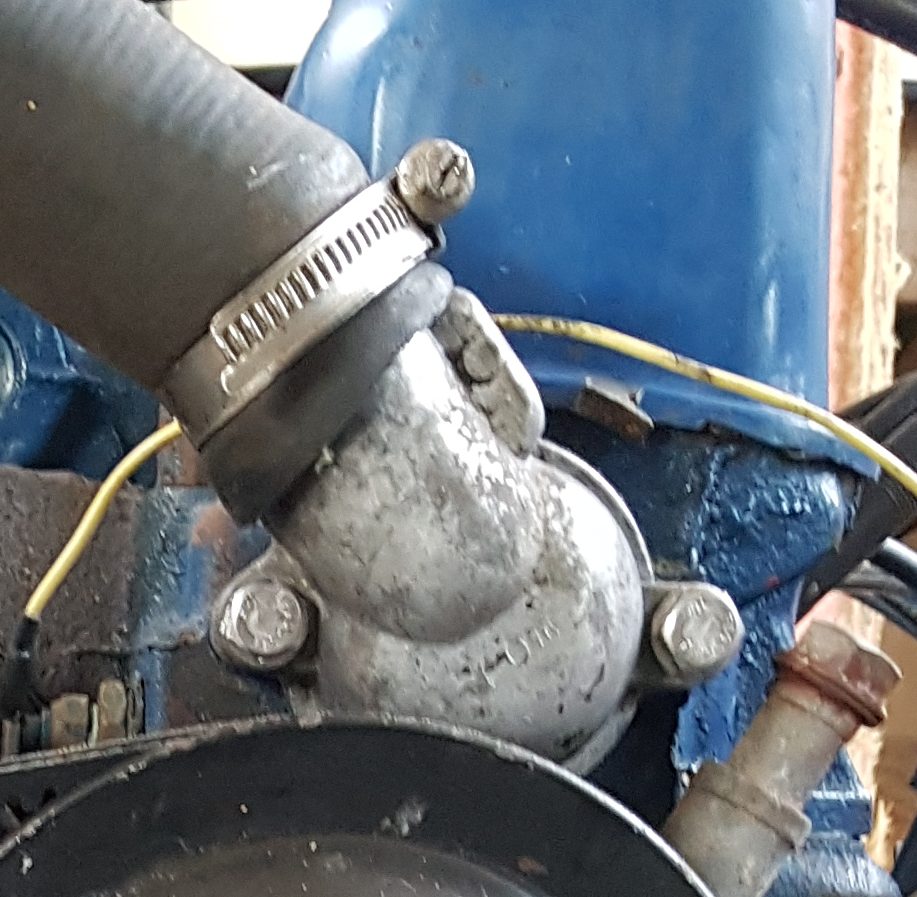
The thermostat housing was a little pitted, so that was duly rubbed on the concrete with a circular motion to grind away some of the surface material to remove the pits (easier than sandpaper and a sheet of glass if you don’t have it) and all traces of the gasket were removed with a utility knife. The thermostat also came with a new paper gasket, which was duly coated in Hilomar M to ensure a good seal and then re-assembled.
It doesn’t look much different than before, except the keen observer will see the bolts have changed just a little and there’s no sign of that coolant leak. The proof will be that it doesn’t leak.
The last task was to get all of the coolant out of the bilge, so to the pumps… well the bilge pump at least. Before I threw the coolant all over the driveway the outlet was redirected into a bucket and fresh water used to dilute the coolant sufficiently until no more “Green” was observed in the bilge discharge.
Time to move onto the Heat Exchanger before re-filling with coolant.
There is surprisingly little about marinising car engines and putting them in boats.
Manufacturers like Mercuiser, OMC, Pleasurecraft and others have being doing this under their own brands for many years and it was quite common in the early 70’s through to the mid 90’s that various companies were doing it themselves in a workshop. My new boat is one of the later.
So after having owned my Nereus for a while now I thought I’d detail what I’ve learnt about it so far about the marinised Ford 6-cylinder engine that is in it;
Ford 250 pre-crossflow inline 6-cylinder (donor either Ford Falcon XA or XB)
Strongberg 1-bbl down draft carburettor
Delco Alternator (10SI body) with external regulator (RE55)
Bosch starter motor
Standard Kettering Ignition with Bosch GM573 points (!!!) and 12V coil
Borg Warner Velvet Drive Gearbox
Savage MK1 Compact Heat Exchanger
Fynspray 3/4″ Raw Water Pump
Marinised Wet Exhaust – Unknown
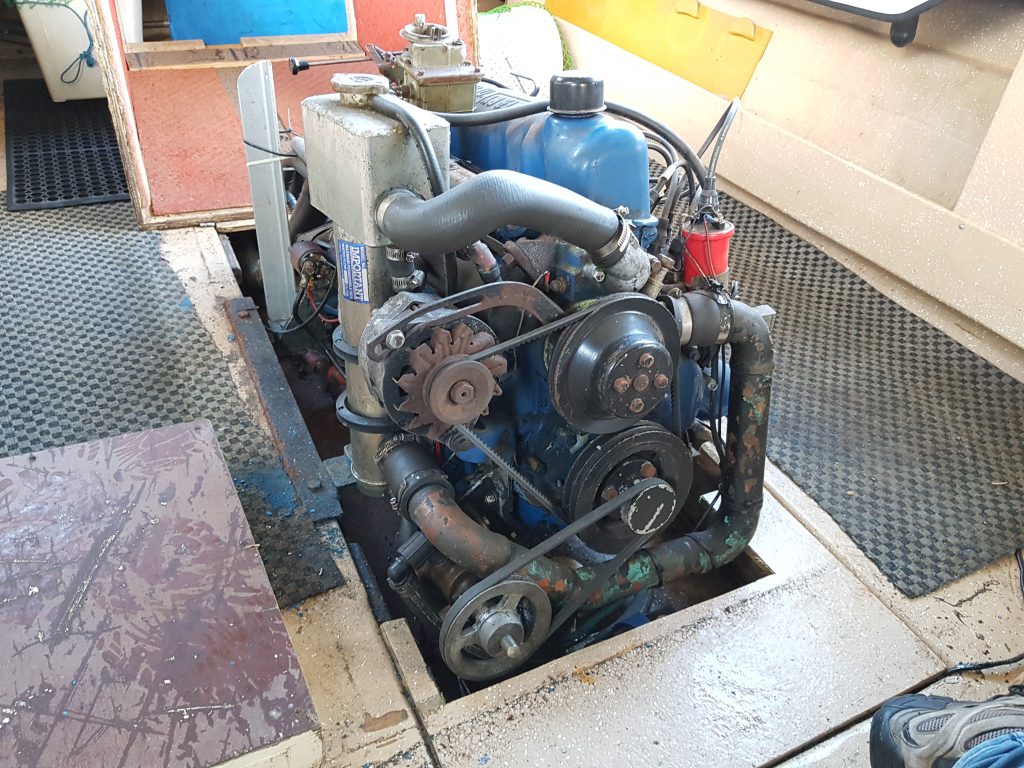
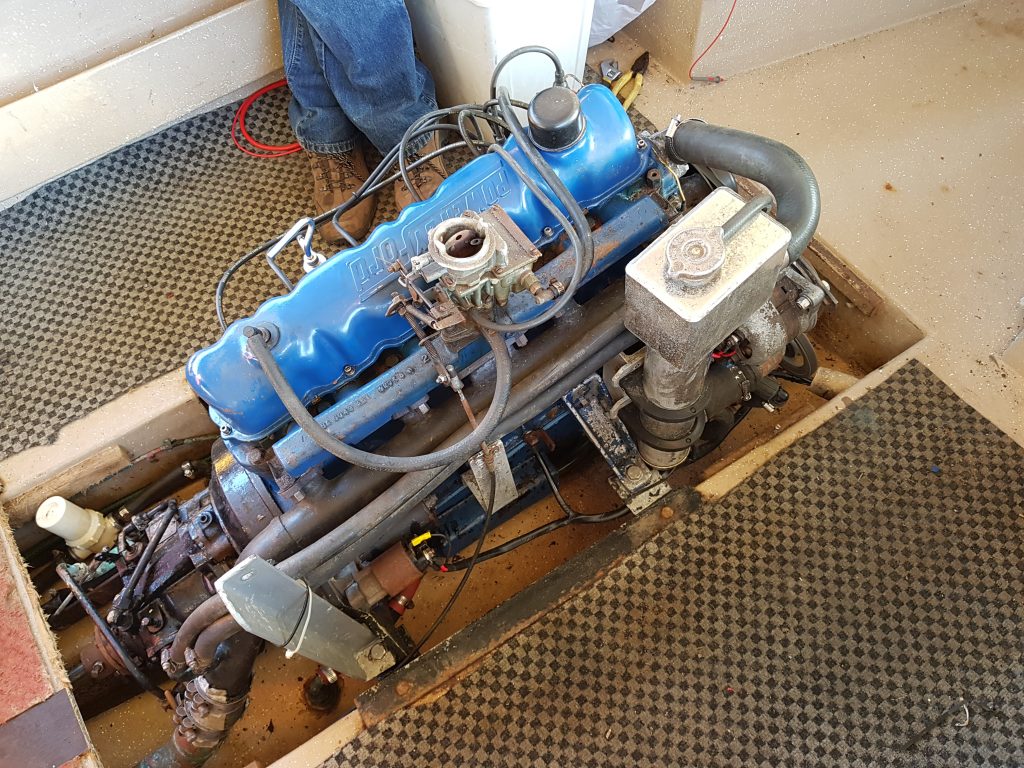
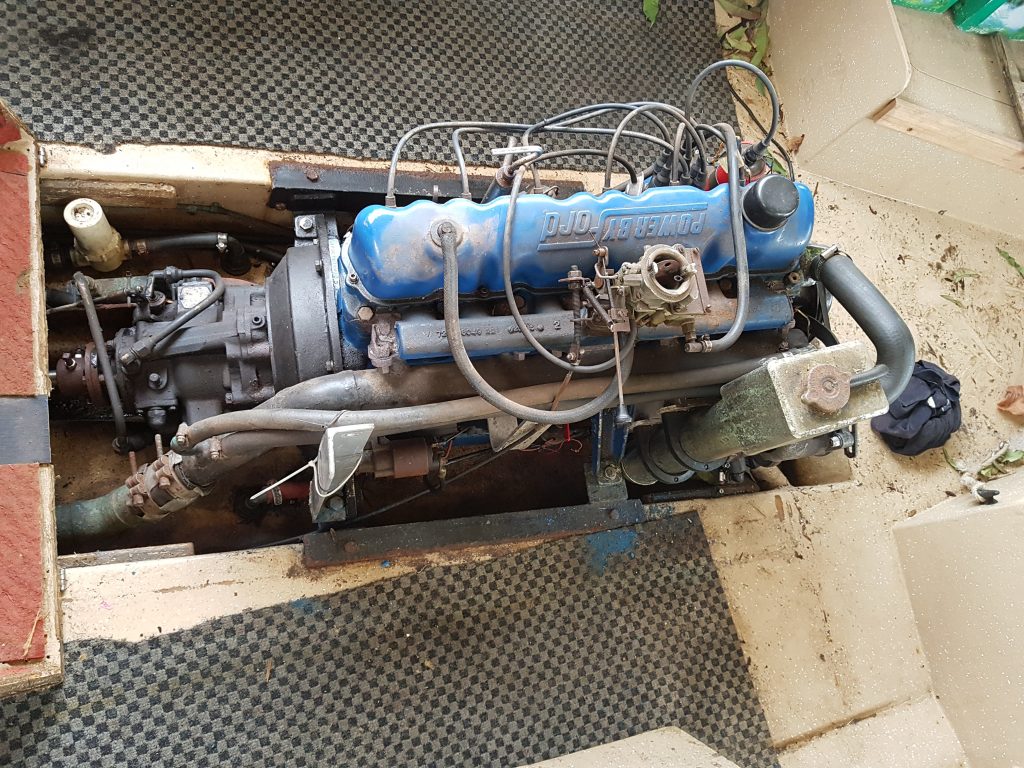
Port Side
Front View
Starboard Side
Top Down
So the only unidentified part on this engine is the wet exhaust manifold, I’m hoping that at some point I’ll work out who made it. There may be a plate or a marking that I’ve not found yet that will give me a clue.
From the list above it is quite clear that this is a “car engine in a boat” which has not yet been completely marinised. Many of the accessories and ancillary parts are still automotive grade parts which are not intrinsically safe in a marine environment. To properly marinise any engine and make it safe one has to reduce the chance of a spark from igniting fuel vapour in the bilge and/or prevent fuel vapour from being released into the bilge in the first place.
With anything that I rely on to get me home safely the engine in this boat is certainly right up there on my list of things to pay attention too. So as I go through the boat doing my usual checks and maintenance I’ll be upgrading various parts to improve safety where necessary. Since this boat was made in the mid to late 1980’s there is no immediate need to rush out and replace the engine and all of it’s accessories, since it has lasted this long already without them.
One of the more interesting jobs with an inboard boat is changing the oil. Unlike a car it’s a little challenging to get under the boat and drain the oil into a pan. When purchasing the boat one thing I noticed was someone had installed a manual oil pump, you should be able to see the shiny thing in the middle there with a handle.
So the first step was to get the engine oil warmed up before we pump it out. Since this was the first oil change I decided to use some engine flush to make sure it’s as clean as we can. Once the engine was good and hot the oil was a doddle to pump into a bucket and remove. Then it was a simple matter to replace the oil filter and re-fill.
I’ve so far been happy with the Penrite Oil I put in my Hilux, so once again I’ve gone with the same brand. Using the Penrite product selector it suggested a standard mineral oil with plenty of zinc, so 5L of Penrite HPR30 was purchased. I’m thankful these older engines only requrie 4 and a bit litres of oil, so only a 5L bottle is required.
I was happy to find that the oil filter used is the same as my old Hilux, that will save some confusion in the future.
Now to get in and start degreasing the engine and bilge.
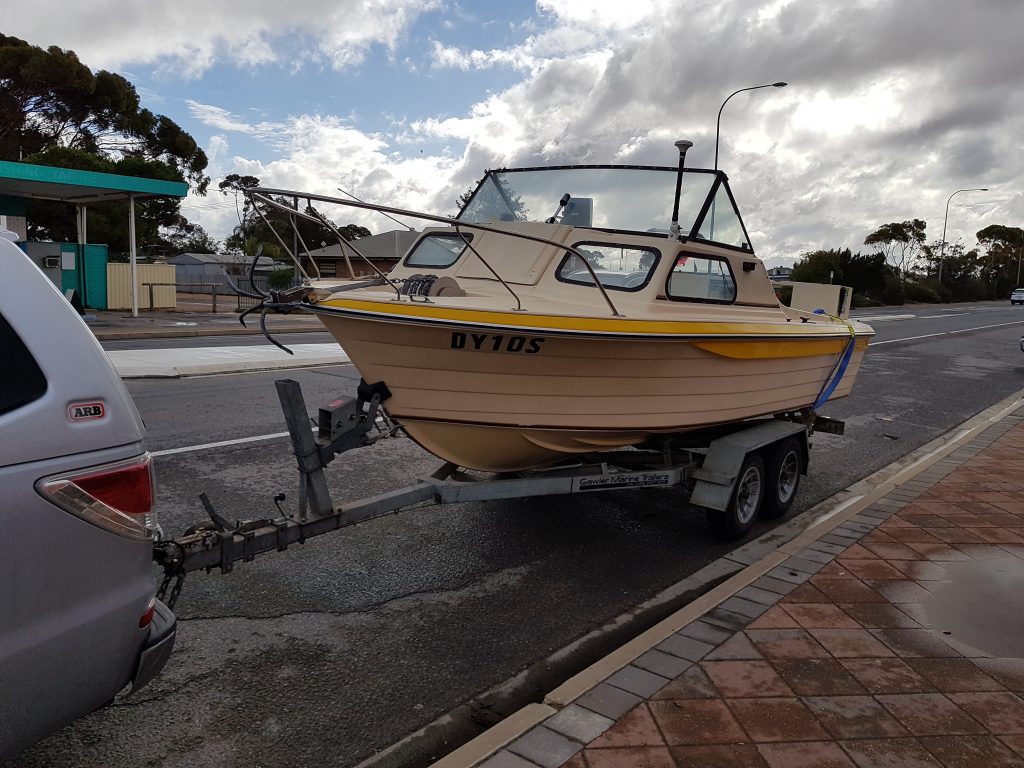
For many years I’ve been wanting to purchase a Nereus inboard fishing boat. These boats were made in South Australia from the early 1970’s until the early Naughties. They are a very popular fishing boat that has a wide beam and is well known for it’s excellent handling in rough seas.
Finally after a 12 month search a Nereus came onto the market that ticked all my boxes. In a nutshell I wanted a boat 16-18′ in length, with a good hull, on a good trailer with an inboard engine and gearbox. If it came with a heat exchanger that was a bonus.
Well here’s a picture of our new purchase on the trailer at Port Wakefield on our way home from Yorke Penninsula. It certainly doesn’t look like a boat built in the mid 1980’s.
While the Nereus is common in SA that doesn’t mean they come up for sale often, it also means that when they do come up they hold their price. So to offset the cost and ensure it doesn’t sit on a trailer for extended periods I’ve gone halves with my Parents. Between my father and I we should able to get her in the water and out fishing as often as we can.
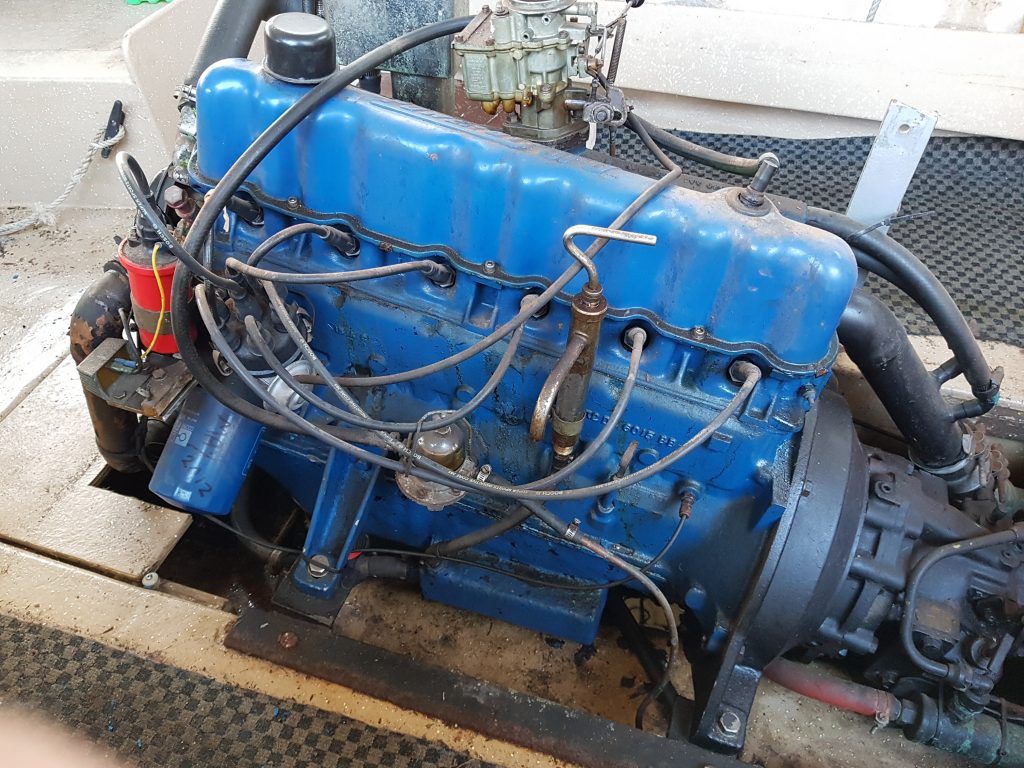
Here’s a few pics of the inboard engine;
The engine in this Nereus is a Ford 250 cubic inch pre-crossflow log head inline six cylinder. Being the pre-cross flow engine this inline six is the American designed log head which was used in a heap of different vehicles. Of note you can find them in Mustangs and F100’s in the states, or Ford Falcon XA/XB/XW/XY and some Cortinas from the 1970’s. The block numbers suggest the doner car was a 1972 Ford XA Falcon This should make it fairly straight forward to get spare parts.
Anyway that’s the Nereus in a nutshell. I’ve already started making a list of the “jobs to do” and I’m looking forward to getting cracking.