
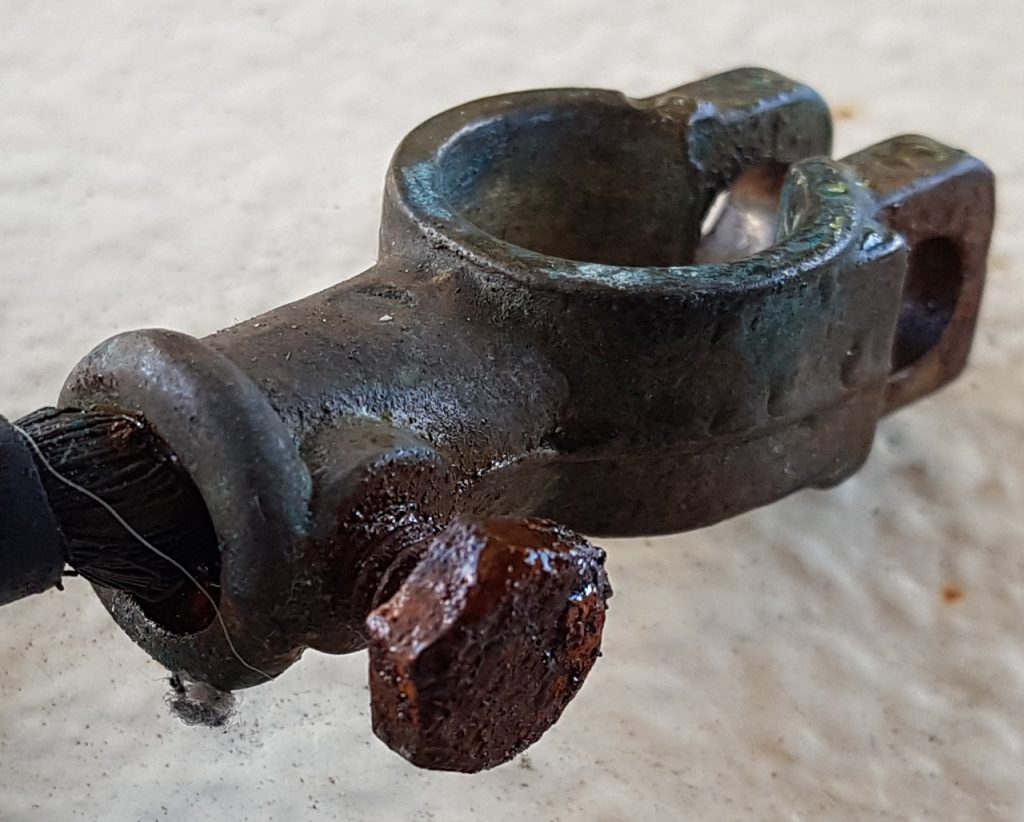
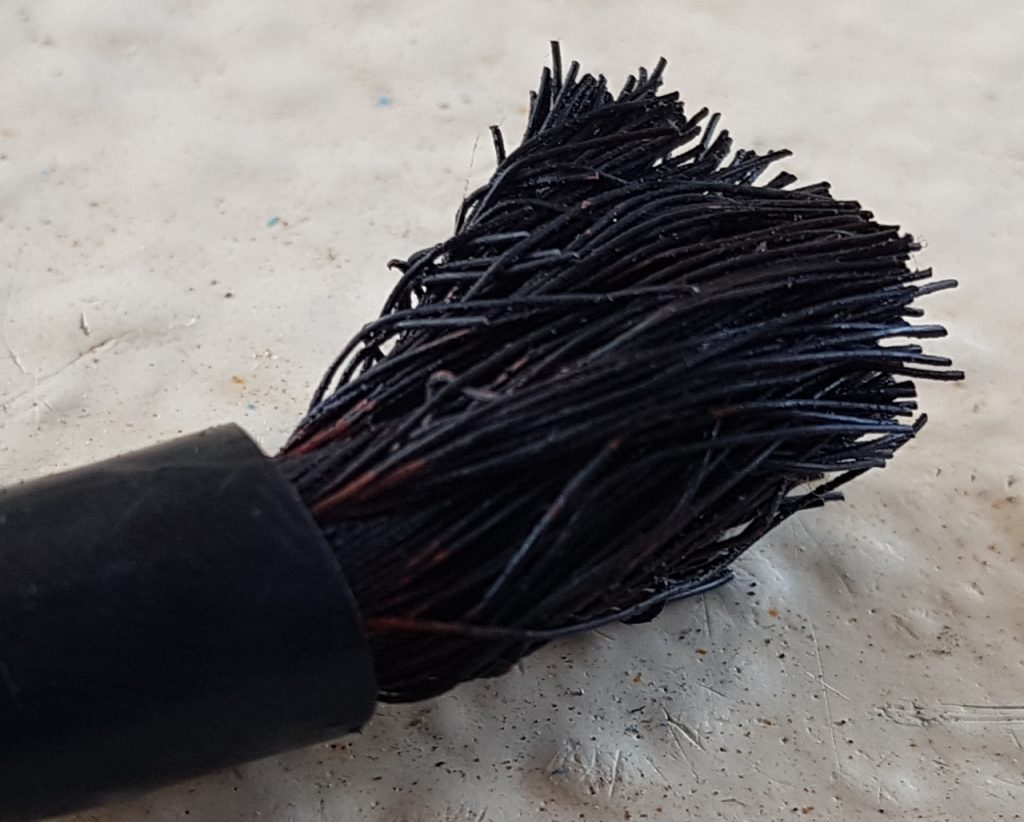
Having serviced and re-furbished a good portion of the engine and accessories I had one more small trivial, quick task to perform. That was to replace some very manky looking battery terminals. So out with the beak nosed cutters, lop the terminal off, strip back the wire to reveal, the copper wires were all black. Oh dear it was going to be one of “those” days.
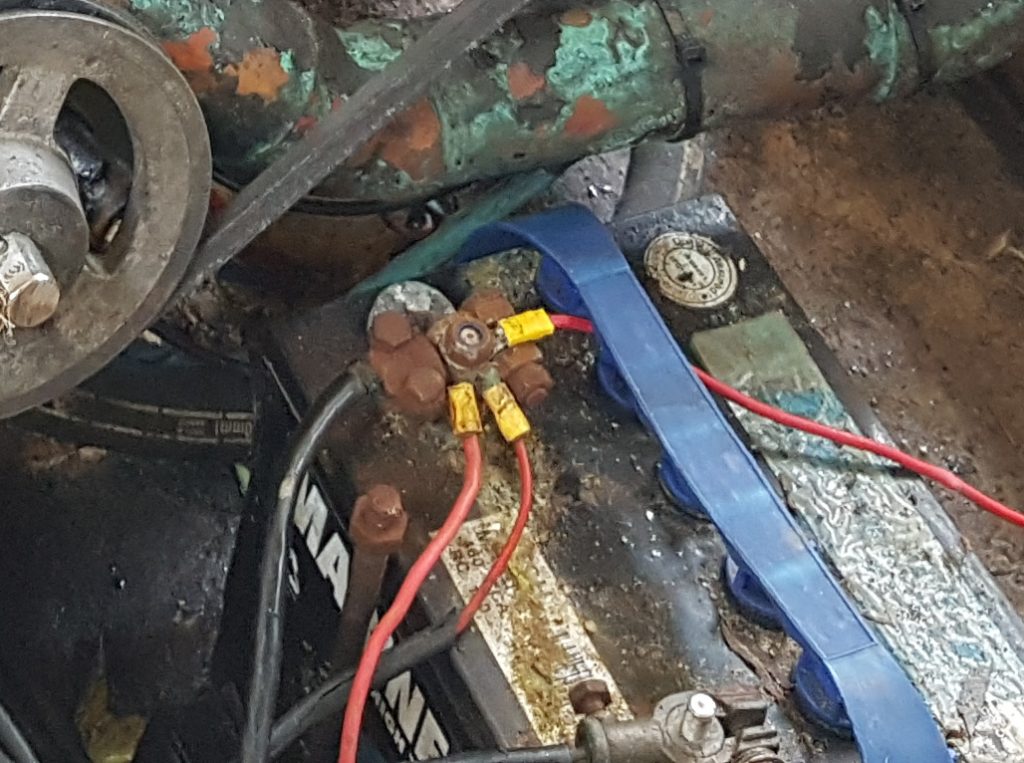
The picture above shows the very manky looking battery terminals and the original orientation of the battery. For reference the terminal in the top of the image is the battery positive, the copper pipe above it is the cold water side of the heat exchanger, err yes that is technically earthed and the battery un-restrained. There is no way we could leave it like that.
So getting back to the wiring, at some point in this poor boats life it had been wired up with standard automotive copper wiring. Now for the majority of the time this is fine in cars and perhaps houses, but in marine environments where corrosion is rife this is a recipe for disaster. The black manky looking stuff is actually a form of copper oxide which is non-conductive and hard to remove. Once it starts to form it doesn’t stop until every strand along the entire length of (and within) the cable has oxidised as well. The worst part is the wires were to the starter motor which relies on a very low impedance.
Thankfully there is a local Jaycar electronics store around the comer that caters to the “Doof Doof” car audio community. This car audio community seems to like big high power amplifiers that use too much gold plating (IMHO) on their connectors and fuse blocks, but it does however mean they stock marine grade Tinned Copper wire in useful sizes from 14 gauge through to 4 gauge in both Red and Black. Better yet it is fine stranded with a soft silicon durable sheath making it very flexible and a pleasure to work with. Below are the ones that I like to work with, hopefully the part numbers out live any URL changes that may occur on the Jaycar site;
- WH3073 15A Red [14 AWG]
- WH3075 15A Black [14 AWG]
- WH3080 25A Red [12 AWG]
- WH3082 25A Black [12AWG]
- WH3060 56A Red [8 AWG]
- WH3062 56A Black [8 AWG]
- WH3064 100A Red [4 AWG]
- WH3066 100A Black [4 AWG]
If you haven’t already found self sealing automotive crimp terminals I suggest you wander off and google these too I’d never seen one until I stumbled across them on one of my YouTube feeds, a big thanks to Damien & Jess from Project Brupeg for putting me onto these when they wired their wheel house. There are also nice kits you can get from eBay for reasonable prices. This type of connector once crimped, you hit with the heat gun and they shrink and seal the end of the connector. It certainly saves a heap of time not having to cut and use a separate small piece of glued heat shrink. Better yet you can see the internals with the heatshrink being semi-transparent, which means if they corrode you’ll find out before it’s too late.
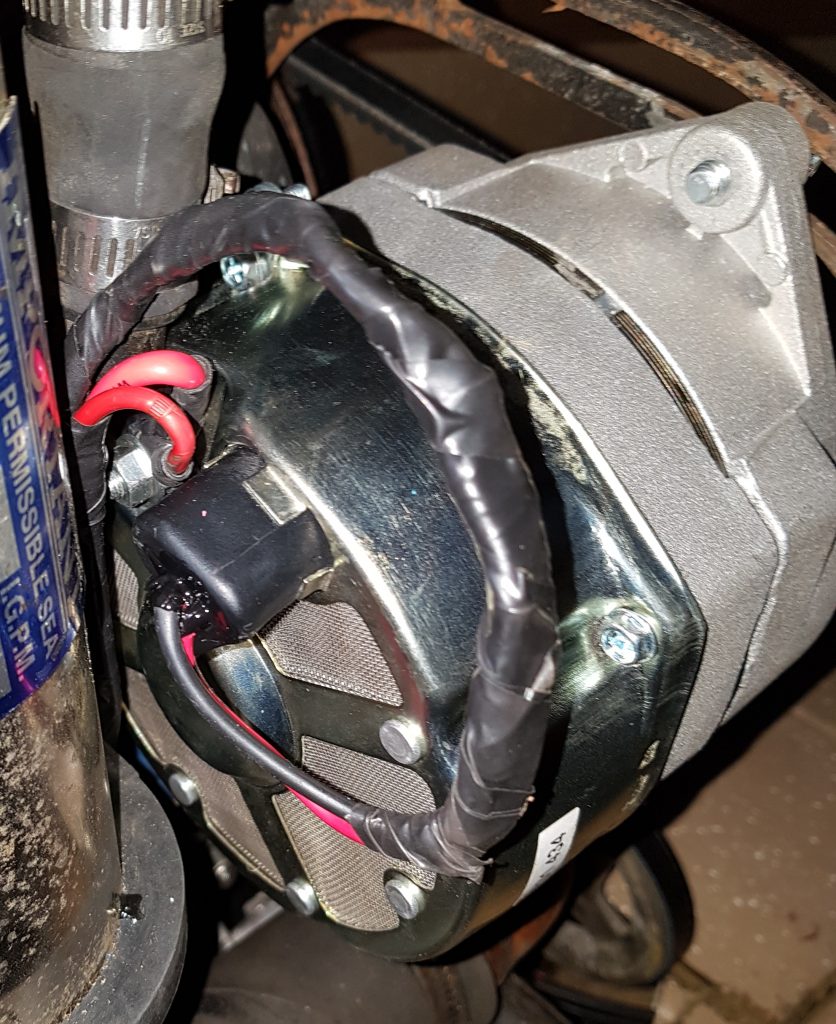
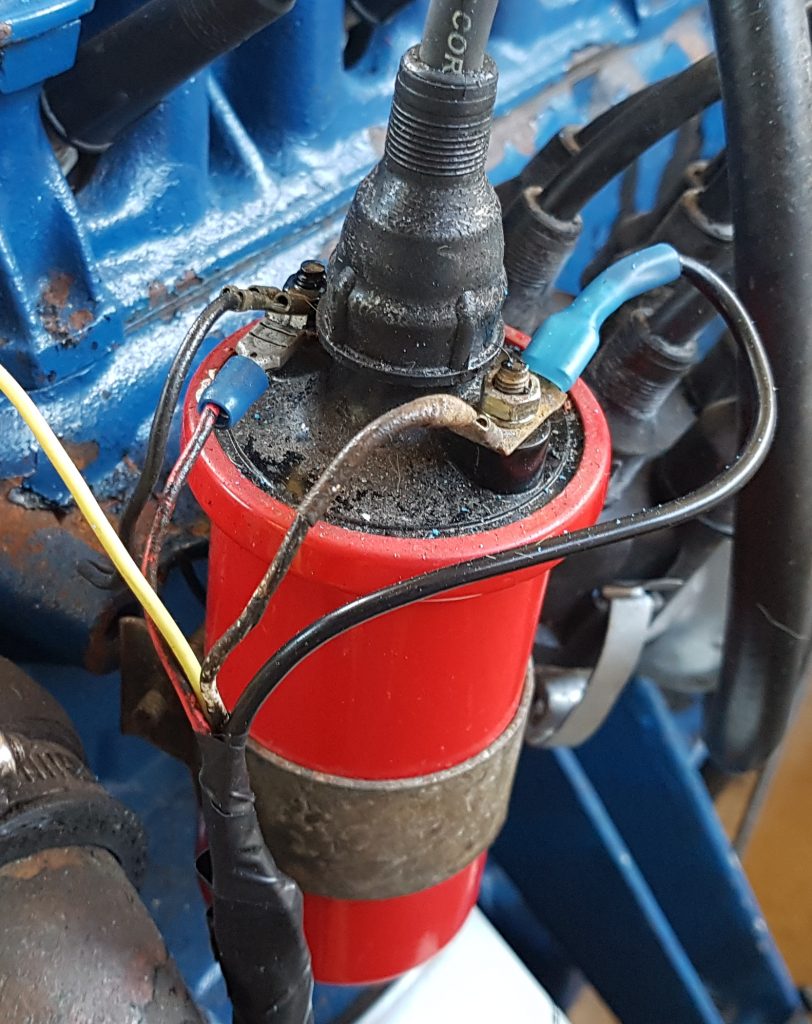
So once armed with cable, connectors and a few roles of Electrical tape it was time to start cutting wires to find the extent of the black wire syndrome. Needless to say I ended up rewiring the entire engine bay, from battery to starter motor, alternator to battery and the remaining Kettering ignition system.
I was thankful that the wiring between the engine and gauges while not tinned had not suffered anywhere near the same level of corrosion. So I stopped here noting that at some time soon I’ll be up under the dash re-wiring this as well. So the proof is in the pudding, here’s a few photos of the completed work.

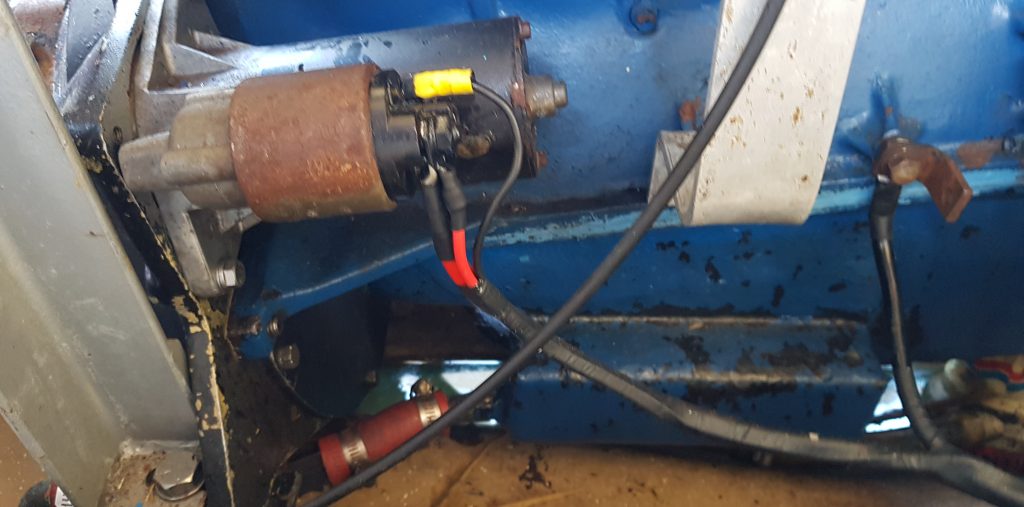
You may also notice that I’ve turned the battery through 270 degrees so that the terminals now face the bow of the boat. This puts as much distance between the battery terminals and the engine and accessories as possible. Directly underneath the battery is a false floor where I should be able to screw a hold down strap to secure the battery in place. Not forgetting to seal the screws since this is a wet bilge. Unfortunately the cover that goes over the battery no longer fits, it’s pretty clear why the previous owner had rotated the battery to where I found it. We don’t technically walk where the battery sits, so I’m thinking of raising up the floor here just an inch to clear the terminals. I’ll do this when I make a new engine cover.