I’ve been running TrueNAS (previously FreeNAS) at home for more than 10 years on various grades of “least expensive” HP Server hardware. I’ve been impressed from the very beginning. With two young boys data has been accumulating at a fast rate for a number of years and my most recent HP ML10V2 server had simply run out of storage space. So when my file server started throwing SMART errors, telling me one of the drives was on the way out it was time to hurry up with that planned upgrade.
I won’t bore anyone with the details suffice to say, it was going to go from a three drive Raid-Z1 array to *at least* a Six drive Raid-Z2 array, increasing storage from 6TiB to a whopping 16TiB and doubling the number of active spindles. That should give us all plenty of time to grow our “media” library somewhat and replace drives as necessary upgrading the pool as we go.
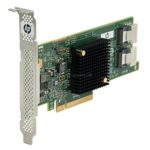
However before I made this jump I needed to get the HP H220 Raid Card re-flashed and reconfigured for a life outside its traditional RAID setup. After a little research on the interwebs it turns out the HP H220 that I’d bought was a rebadged LSI/Avago/Broadcom SAS9207-8 controller with custom firmware. It pays to cruise the interwebs (especially Serve The Home forums) and find out about your cards chipset, since there are two known versions of the HP H220 card in circulation and they use different chipsets, which can be bothersome.
Now these Storage cards are “intelligent” and come configured for SAS/SATA RAID systems in what’s called IR mode. For TrueNAS we need to the card in a more traditional IT or JBOD mode where TrueNAS can see and control the disks each individually. It does seem odd that we take these high-spec cards and dumb them down, but keep in mind the two SFF-8087 connectors on the card can drive up to four SATA drives at 6Gbps without flinching, with all eight channels singing it will bring the I/O load up on any PCI-E 2.0 bus . For less than A$65 at the time of writing this is still good value.
So just how does one re-flash the firmware on these LSI 9207-8 cards without bricking them ? Well it turns out these cards are hard to brick, the software has a number of checks to prevent silly mistakes, so they are not as fragile as many would fear.
However there are some tricks that I learnt which I thought I’d share, note this is not a how to guide just a collection of my notes I made as I went;
- The DOS version of the SAS2FLSH utility is what we want to use, it will allow the upgrade or downgrade of firmware and card bios, the UEFI, Windows and linux varieties are not so nice, there is a technical article (ID: 1211161501344) that you can read all about it (YMMV).
- You can download (at the time of writing) all of the firmware for these cards from the Broadcom website. The webpage is not intuitive, start in the Support and Services / Support documents and downloads page, search using “Legacy Products” and “All legacy products” then 9207-8, perservere there are there and can be found; don’t forget to read and accept the Broadcom license agreements.
- You will need the P20, P19 and the P14 firmware with IT, IR, BIOS for MSDOS, they are 1.7MB zip files.
- You can then make yourself a FreeDOS boot disk using Rufus
- Copy the P20 firmware (9207-8.bin), P19 bios (mptsas2.rom) and P14 sas2flsh.exe utility to the DOS boot disk, and you’re done.
- The P14 SAS2FLSH utility does not balk at the card being branded HPE when it’s expecting to see LSI, later versions of SAS2FLSH (P19/P20) do this check and will refuse to update. Note that once you write the LSI bios you’ll need to find the original HP bios ROM on the interwebs if you want to go back, there didn’t appear to be any “save” current bios options… caveat emptor
- The P20 bios ROM will “red screen of death” on some HPE server machines, my ML10V2 was no exception; I simply downgraded the bios to P19 which was 6 months older than my HP bios (J10) version and worked.
- Once flashed, reboot the machine and enter the controller configuration and setup the card the way you need, hint it helps to specify which card/drive you will boot from, might save you a few unnecessary reboots to find out why it’s not working… sigh
Anyway I’ve made this post to firstly remind me what I’ve done if and when I need to repeat this exercise in the future, it may also be helpful to someone that is trying to update the card and is having trouble. These cards are difficult (not impossible) to brick, but the above certainly worked for me on my hardware, as always YMMV.