 After pulling the bottom cover off my second-hand HP Probook 5320m a couple of times I was pleased to discover a PCI-E slot for a HP un2420 mobile broadband modem. It appears that the Cellular antennas are already built within the lid (or screen) of the laptop. A light bit of reading also suggested that these modules were capable of decoding GPS signals too.
I just had to try one.
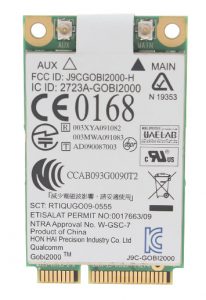
So for the princely sum of $35 I procured a HP un2420 Gobi 2000 module from a local eBay seller. There are suppliers on eBay that are selling these HP Gobi 2000 modems out of China for $11, which is an absolute bargain. YMMV. I didn’t want to wait until after Christmas to try one so I purchased one at the higher price.
Now of course I want this to work in my shiny new Ubuntu 16.04 LTS laptop. Oh well I’ve always welcomed a challenge. I’ll detail the steps I took to get to a working solution.
First we should check we can see the module;
#$ lsusb

Bus 002 Device 002: ID 8087:0020 Intel Corp. Integrated Rate Matching Hub

Bus 002 Device 001: ID 1d6b:0002 Linux Foundation 2.0 root hub

Bus 001 Device 004: ID 05c8:0403 Cheng Uei Precision Industry Co., Ltd Webcam

Bus 001 Device 003: ID 03f0:241d Hewlett-Packard Gobi 2000 Wireless Modem

Bus 001 Device 002: ID 8087:0020 Intel Corp. Integrated Rate Matching Hub

Bus 001 Device 001: ID 1d6b:0002 Linux Foundation 2.0 root hub
I’ve highlight what we’re looking for (in blue) which is the “HP Gobi 2000 wireless modem”. You can tell that this device is currently un-programmed as the product ID is “241d” and changes to “251d” once the firmware is loaded. You also need to check that /dev/ttyUSB0 exists and that your user that starts the 3G cellular modem is in group dialout. This isn’t necessary right now but does simplifies things later.
Now you’re going to require a Microsoft Windows machine, sorry there is no other easy way around this. Some have managed to pull apart MSI files in wine, I didn’t get that lucky. The Qualcomm Gobi modems down load the firmware into the modem at power on, once the firmware has been download the modems will work. I was lucky to have the same laptop with Windows 10 installed, so I simply installed the driver on this second machine and then stole the files I needed on a USB stick. I had to install the un2420 module in the Windows machine to get the drivers to load.
From within the Windows driver there are two directories from which we need three files;
- ….\Qualcomm\Images\HP\UMTS\amss.mbn
- ….\Qualcomm\Images\HP\UMTS\apps.mbn
- ….\Qualcomm\Images\HP\6\uqcn.mbn
You’ll need to work out where the drivers get placed depending on your version of windows, it will be installed in the program directories there somewhere. I found them in the Program Files (x86) directory on Windows 10. The files above are what you require for a Generic UMTS modem (6) that is not vendor network specific or locked. This worked nicely for my unlocked module and Telstra pre-paid SIM. YMMV.
Now once you have these files on a USB stick you can start work on the Linux machine.
#$ sudo apt-get install gobi-loader
This will get the udev helper we need to load the firmware into the modem. Once this is installed copy the files from the windows machine into this directory, watching file permissions of course;
#$ sudo cp /mnt/usbstick/* /lib/firmware/gobi
As mentioned we want all three “mbn” files above in that directory. Now you might like to check that the udev rules for QDL modems are correct in the following file;
#$ less /lib/udev/rules.d/77-mm-qdl-device-blacklist.rules
Your looking to check that the following two lines exist;
#HP un2420 Gobi QDL Device

ATTRS{idVendor}=="03f0", ATTRS{idProduct}=='241d", \ ENV{ID_MM_DEVICE_IGNORE}="1"
These lines will prevent ModemManager in Ubuntu from trying to take control of this device at boot up before the udev helper gobi_loader gets a change to load the firmware. Now if all is going well reboot the machine and then check the following in a terminal;
#$ lsusb

Bus 002 Device 002: ID 8087:0020 Intel Corp. Integrated Rate Matching Hub

Bus 002 Device 001: ID 1d6b:0002 Linux Foundation 2.0 root hub

Bus 001 Device 004: ID 05c8:0403 Cheng Uei Precision Industry Co., Ltd Webcam

Bus 001 Device 003: ID 03f0:251d Hewlett-Packard Gobi 2000 Wireless Modem

Bus 001 Device 002: ID 8087:0020 Intel Corp. Integrated Rate Matching Hub

Bus 001 Device 001: ID 1d6b:0002 Linux Foundation 2.0 root hub
You should notice that the product ID has changed from 241d to 251d, meaning that firmware is now loaded in the 3G modem. I tried not rebooting this machine which turned out to be a mistake. ModemManager is a pernickety piece of software that won’t do anything unless everything is 100% right. I wasted a number of hours chasing my tail trying to get services shutdown and restarting stuff.
You should also see that there are now three tty USB devices attached to the system;
#$ ls /dev/ttyUSB*

/dev/ttyUSB0 /dev/ttyUSB1 /dev/ttyUSB2
If you don’t see these three devices then there is something wrong. I’d suggest you start with dmesg and searching your way through syslog to find out why what’s gone wrong. It can take a while. When you do get things right about 13-15 seconds after the kernel loads you should see the firmware loaded into the modem and the additional USB serial ports being created. If the firmware doesn’t load you will find error messages in syslog.
Now you should be able to configure the NetworkManager to actually use the Modem. I simply went into NetworkManager -> Edit Connections and created a mobile broadband connection from scratch. The APN we want to use for Telstra is “telstra.internet” and the rest is pretty much a vanilla install.
Once you’ve got the connection, done you should be able to connect to the internet via the cellular modem.
Oh and don’t forget to plug your SIM into the slot in the battery case. Now you can sit back and enjoy Cellular Mobile data without any external USB dongle to snap off, or get left behind.
Yay !
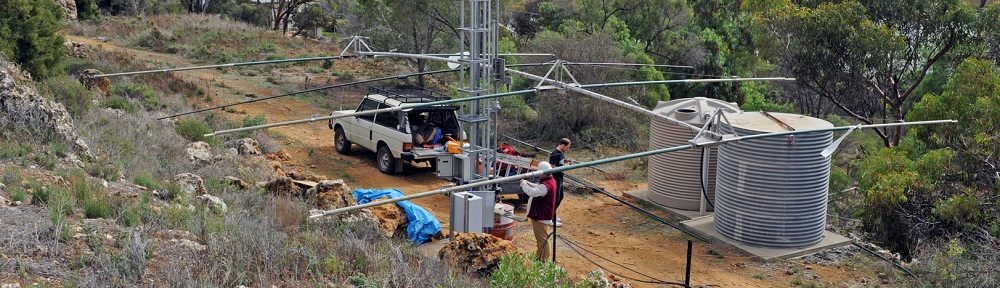


 So during the shed construction, prior to the concrete floor being poured I had a local contractor come in and excavate the foundation.


 Upon undoing the nuts on the rear drivers side wheel oil began weeping from the threads, this was not going to be good. Yep just as I feared the inner oil seal had gone and diff oil had run throughout the drum brakes, bugger that’s got to be fixed now. So once I’d removed all of the brake gizzards the drums were sent off to be machined, over sized brake pads radius-ed and new master cylinders obtained from the local brake repair shop.
 The tricky part of this diff rebuild was getting the axles out. They are quite different from my old Land Cruisers and I again phoned a friend Gary VK5FGRY to help me get it apart. After removing the brake lines (oh yay!) and four nuts the axles, backing plate and wheel bearings simply slide out as one assembly. The wheel bearings were also very growly, so off to the local mechanic with these since you need a press to do the job properly. Don’t forget to do both sides. Car stands and a trolley jack are mandatory to do this safely.
 So after an eye watering $2300 in materials I was ready to rebuild the diff once and for all.
 Once the diff centre is in the axles can be reinstalled and the brakes put back together. I really like the way in which Toyota prevent you from damaging the inner oil seals, hard to explain but the axles can’t hit the seal while your sliding the axle back in, it’s very ingenious and you’ll find out what I mean if you try it.


 One thing we did learn is that 65 year old hand mixed concrete is rather hard. This required a much larger hammer. A big thanks to Peter VK5KX for bringing the beast !


 ne of my AREG club members emailed our club mailing list with details of a local computer recycling shop selling refurbished HP Probook 5320m’s for $100. How could we go wrong.